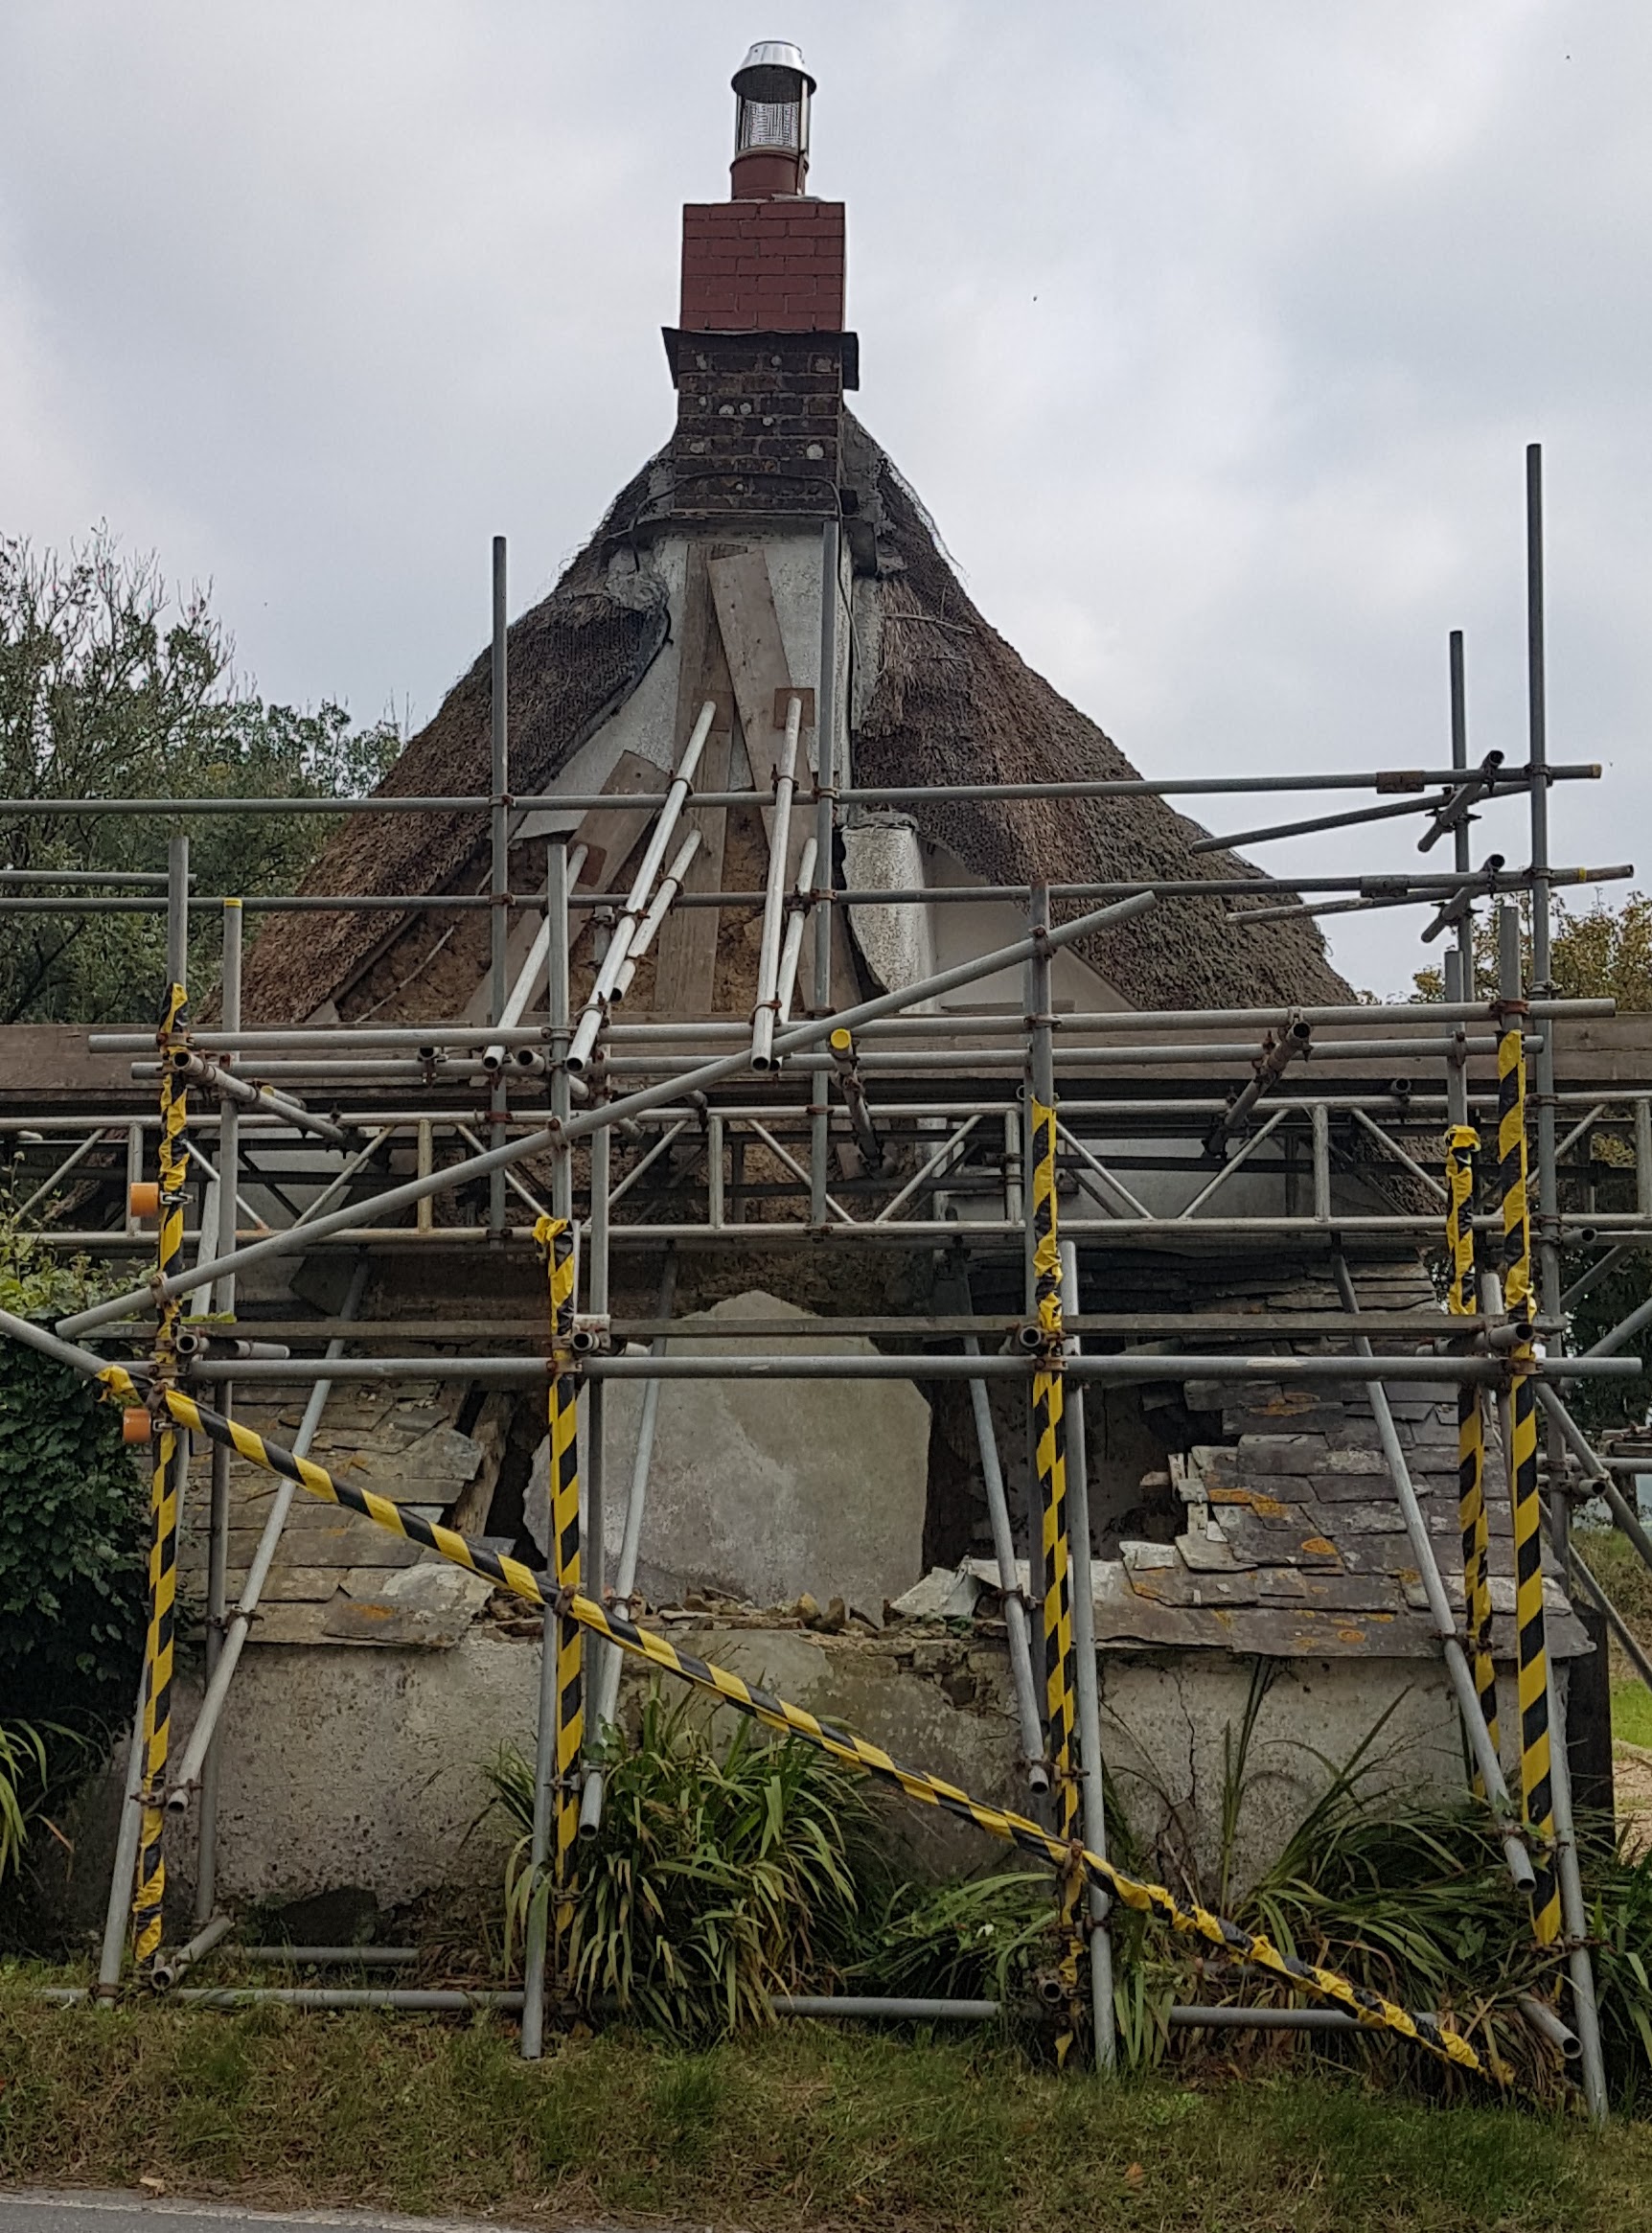
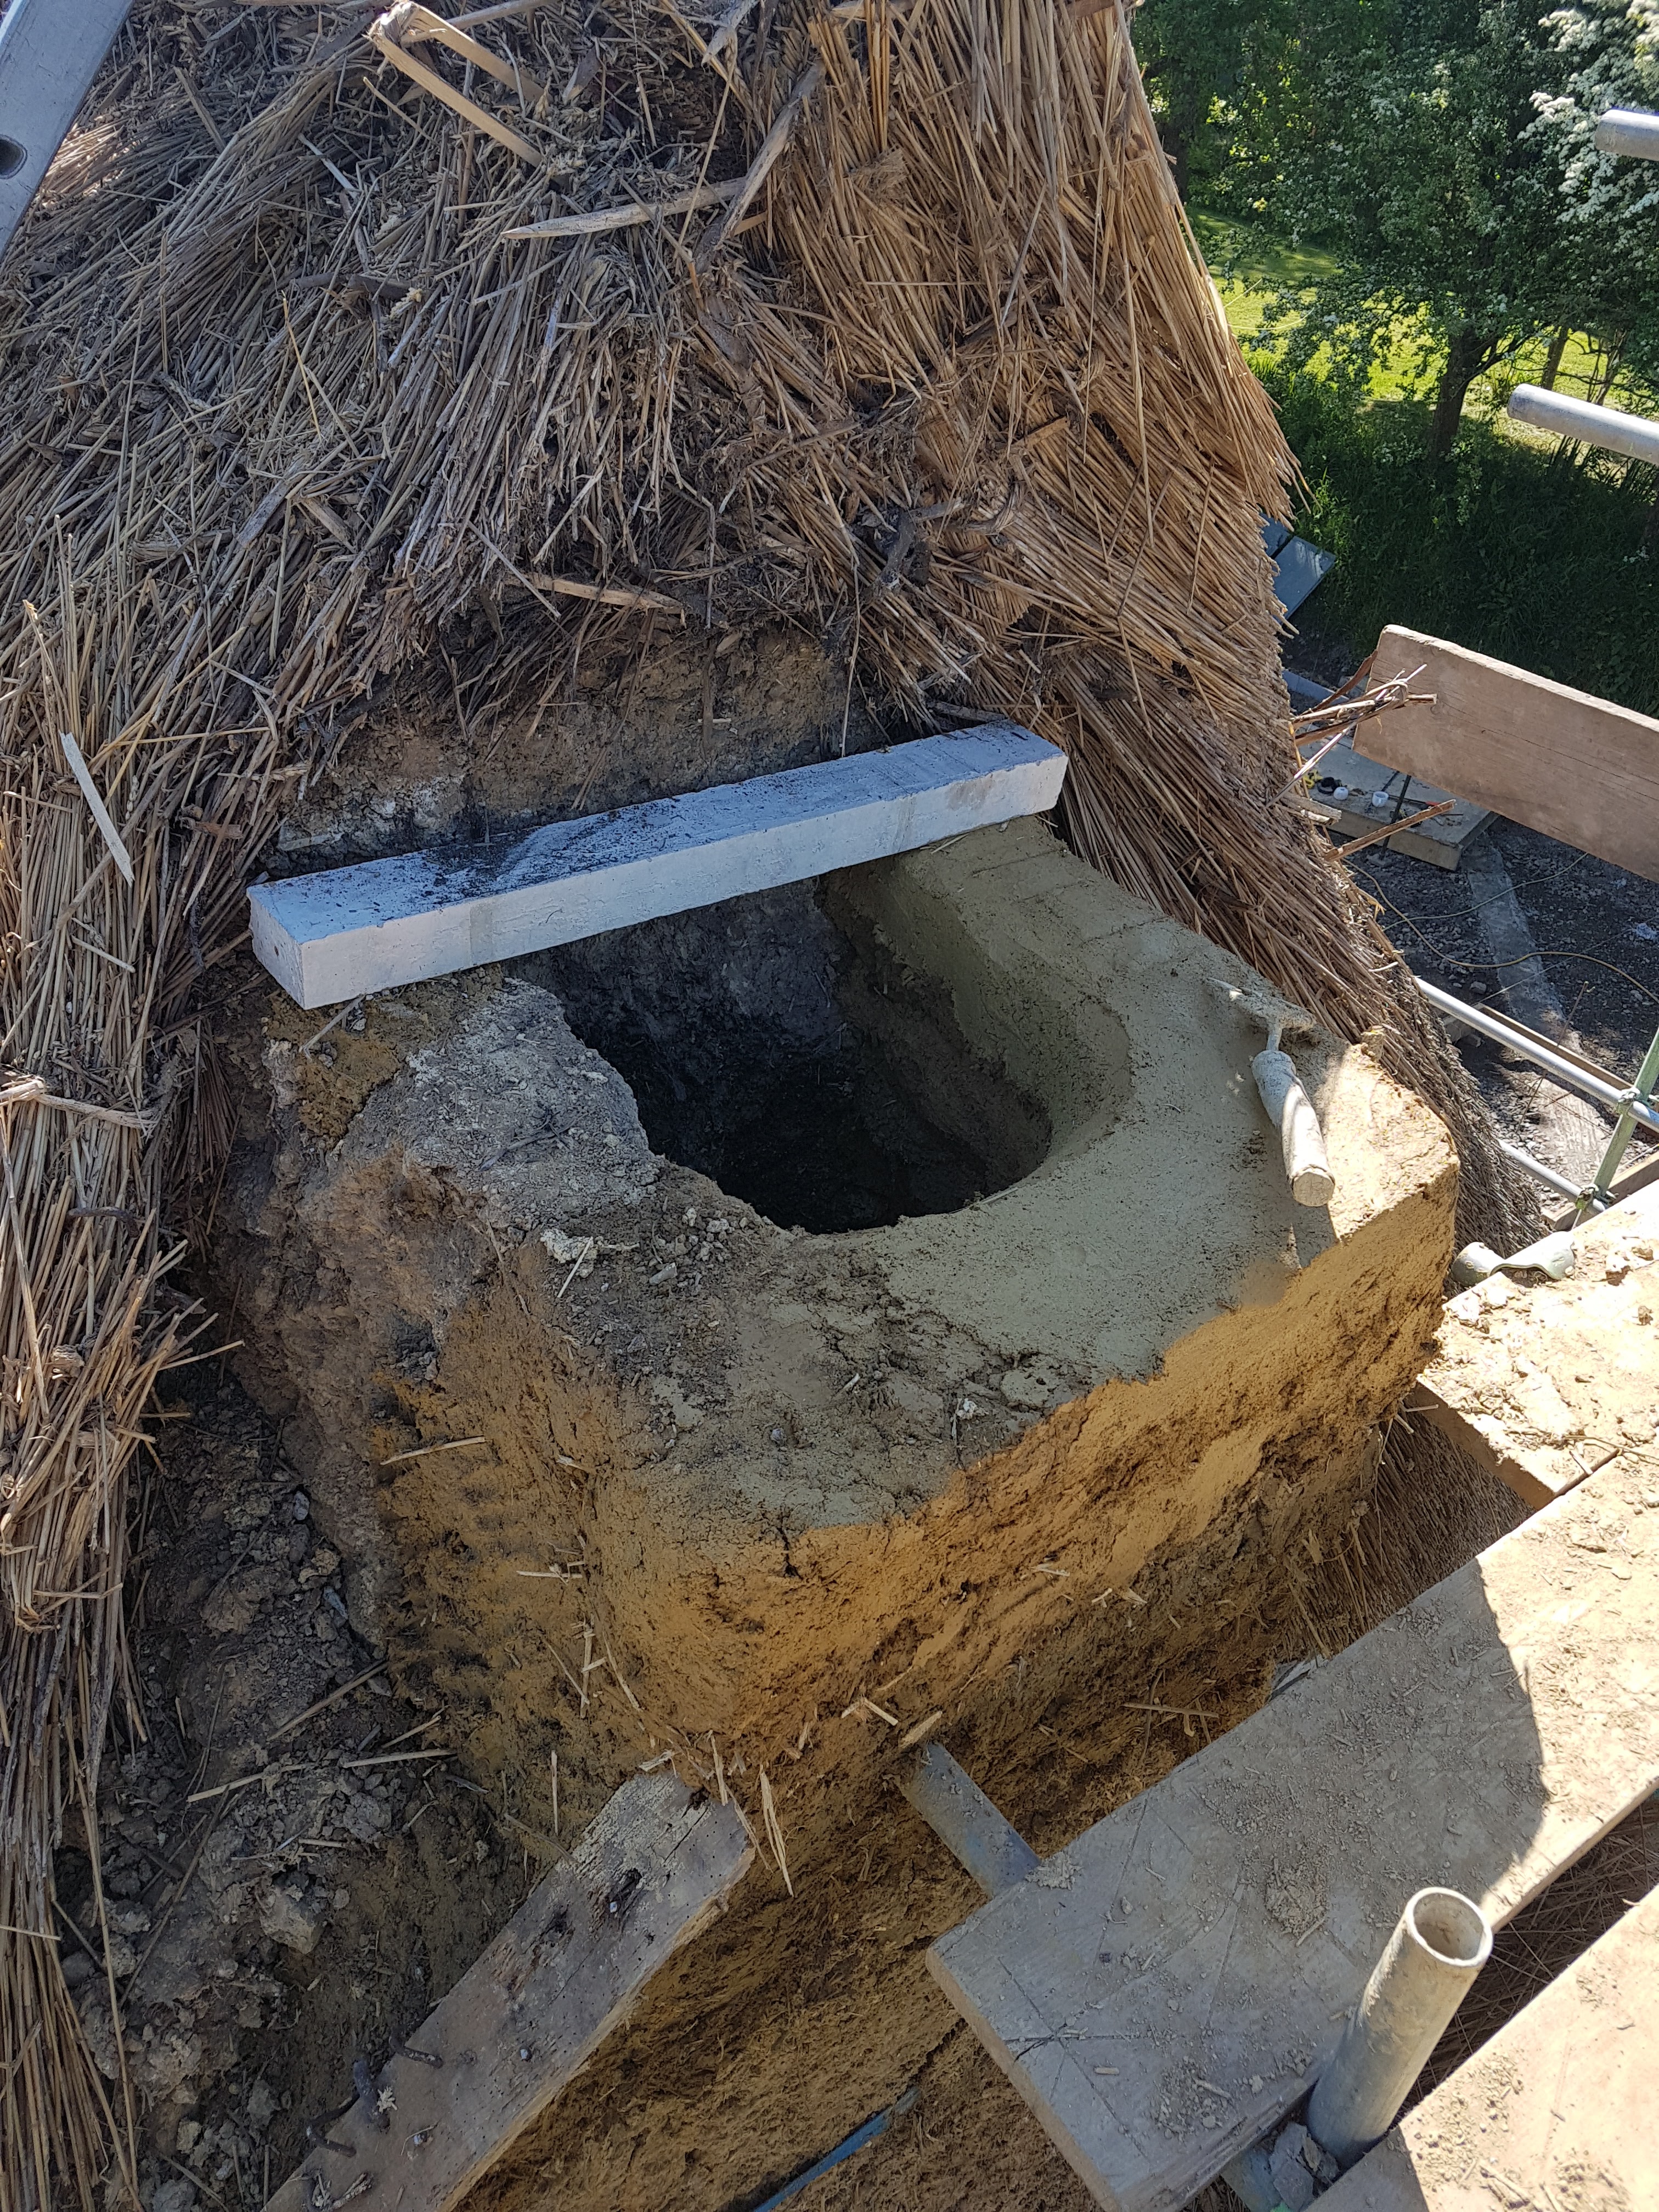
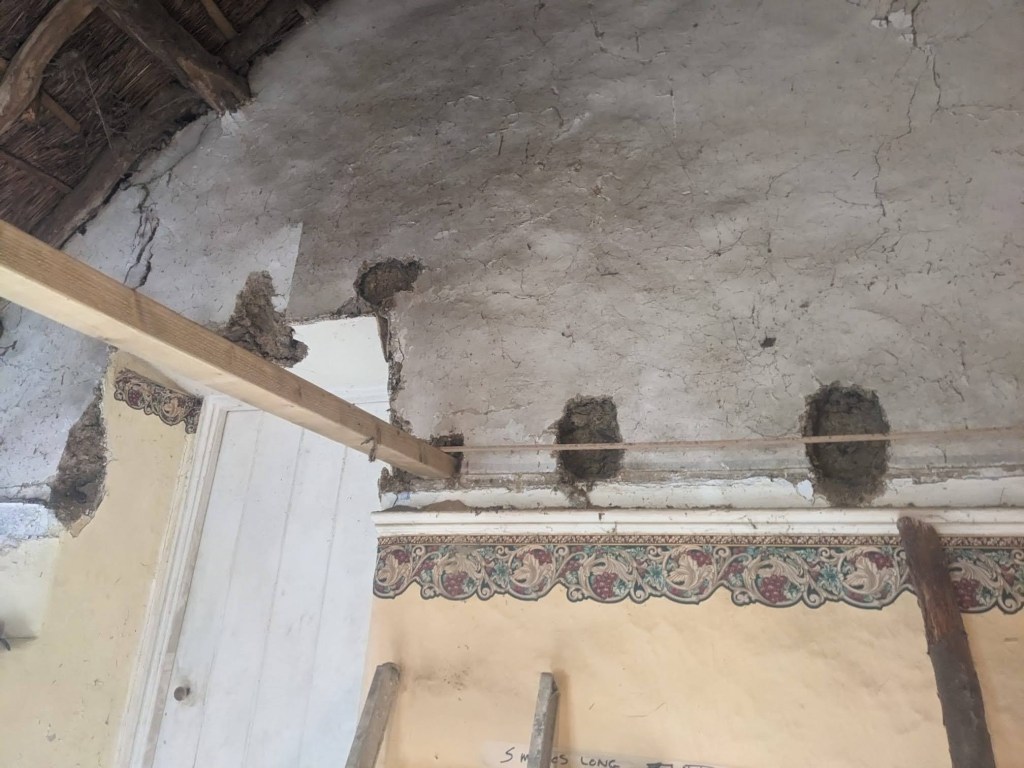
A small cob cottage with a big problem. Overly thick cement render on a cob gable wall. A large piece of the render had fallen off and gone through the lean to shed roof. The cottage had stood empty for quite a few months.
Once the debris had been removed it was possibleto see the damage and to fix it.
once the cob body of the gable had been repaired it was possible to repair he chimney top
after which it was all left to dry after which it was rendered with lime
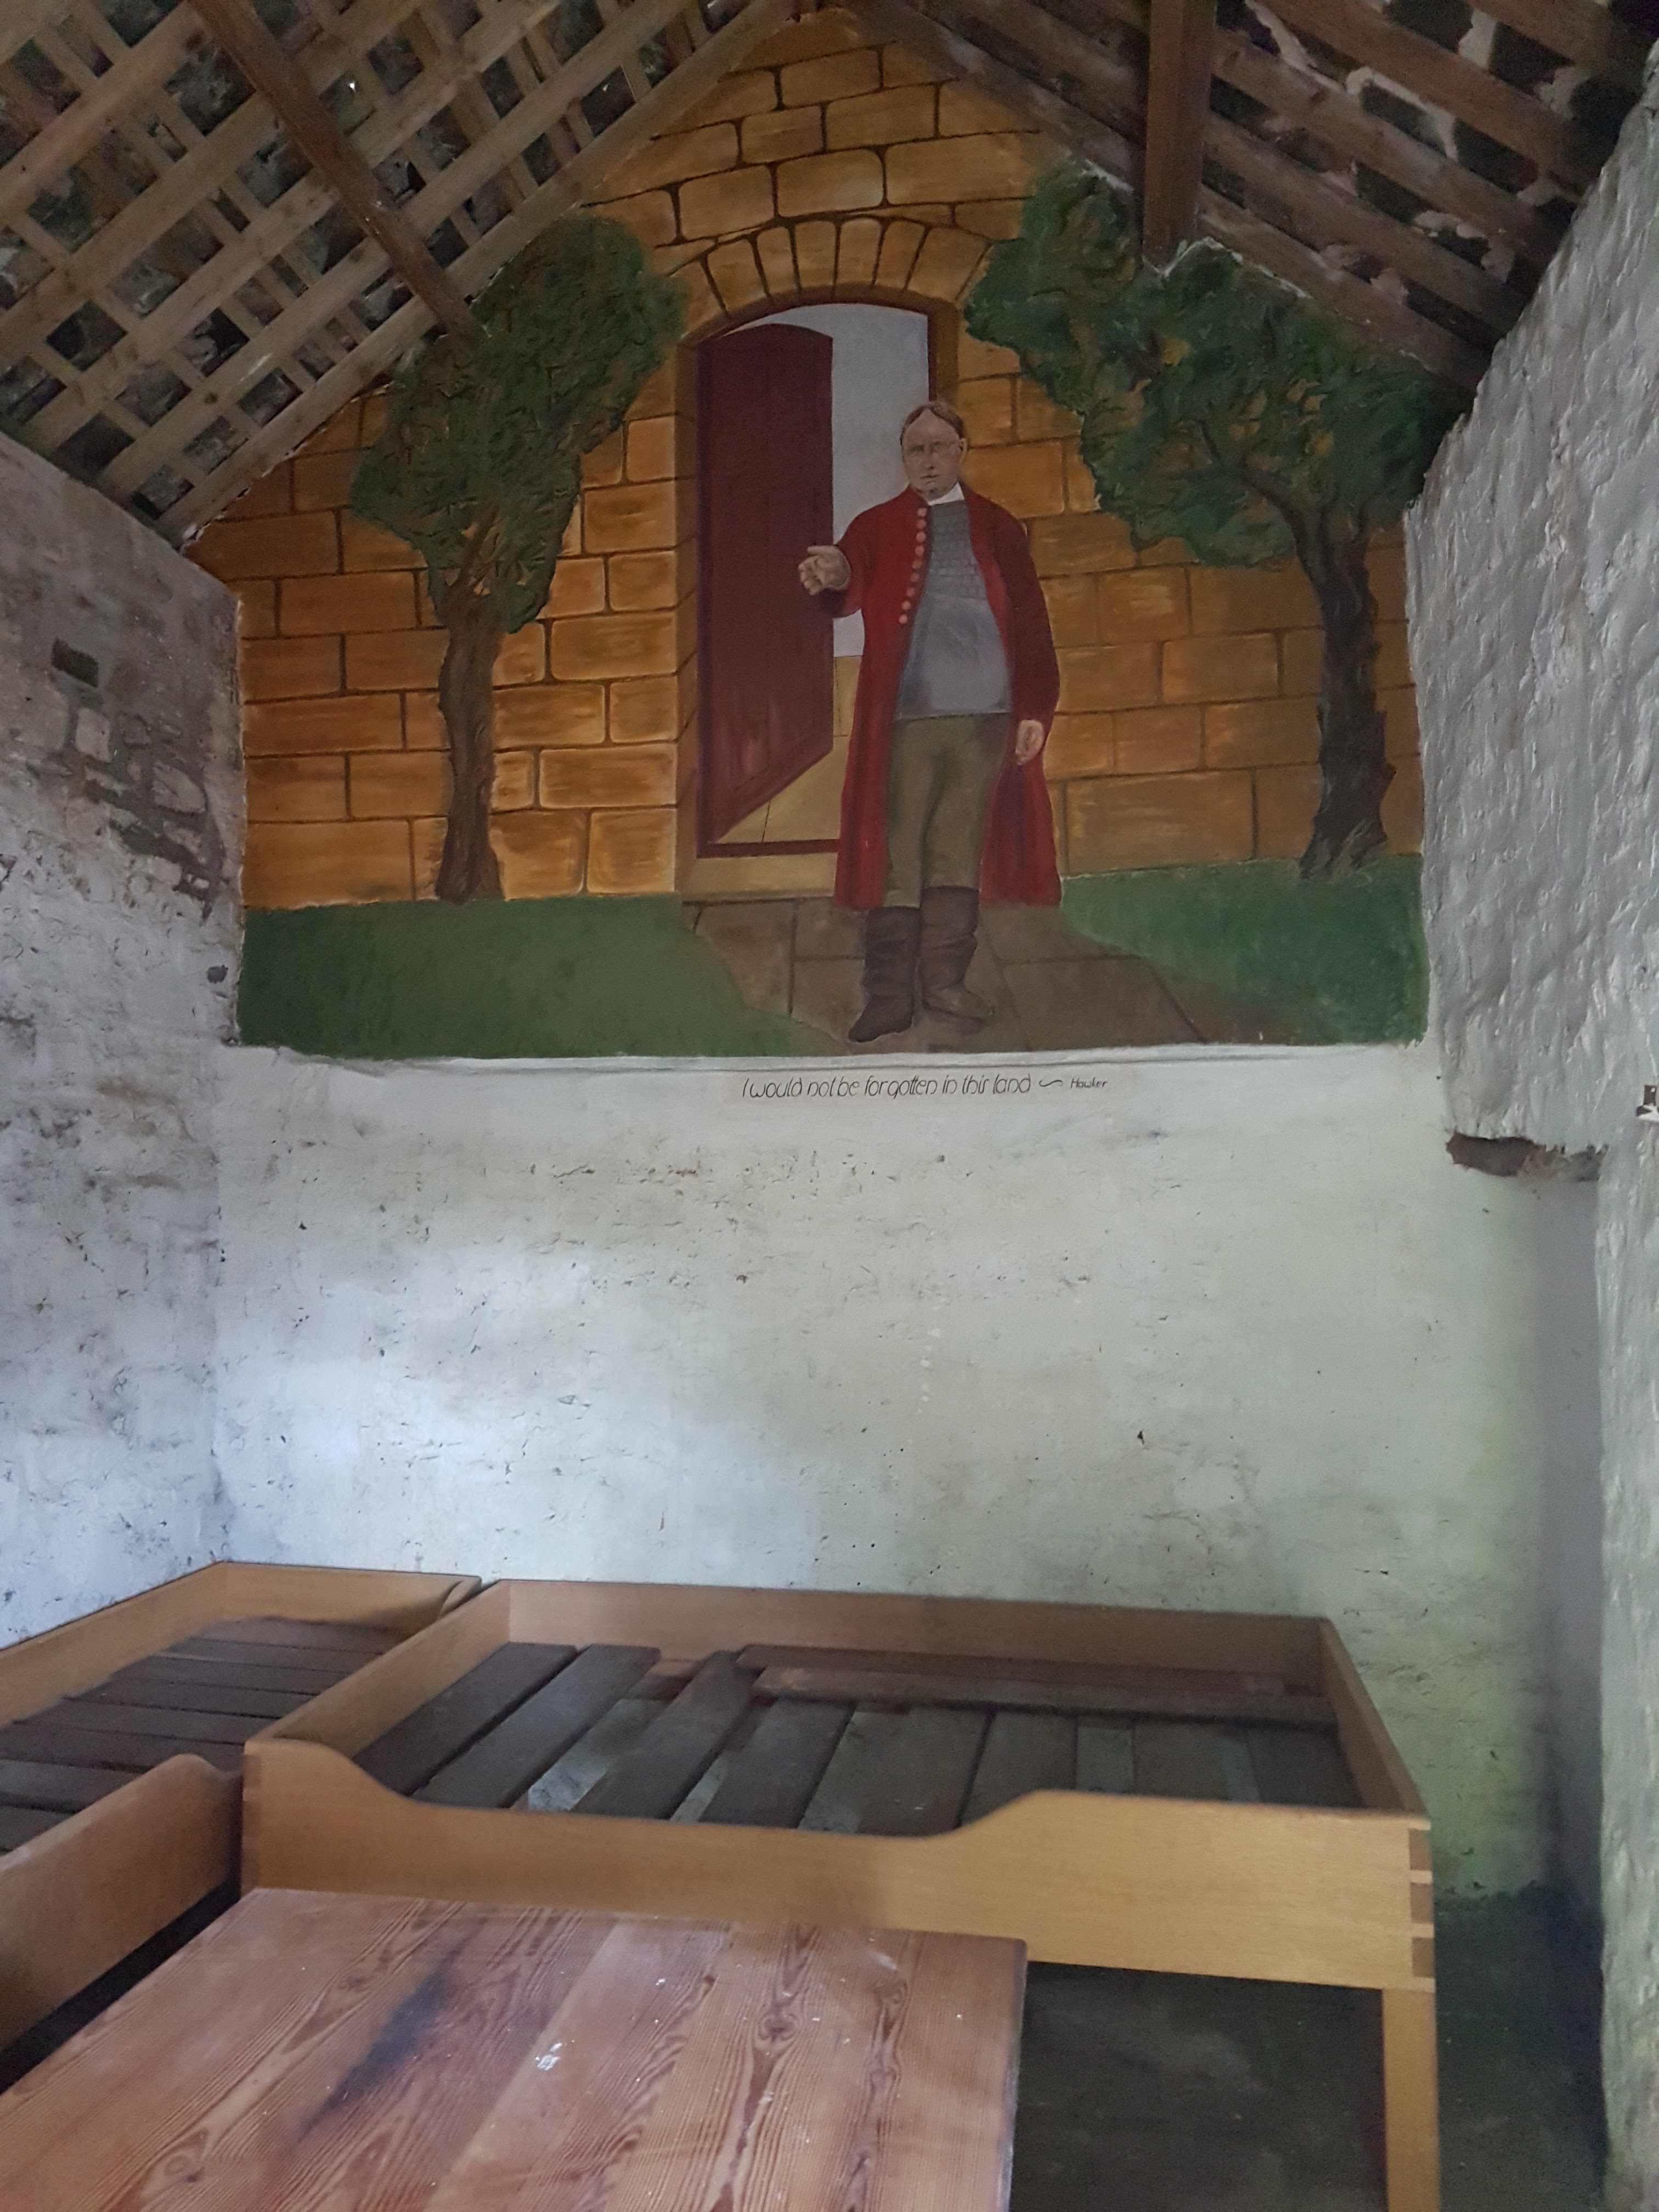
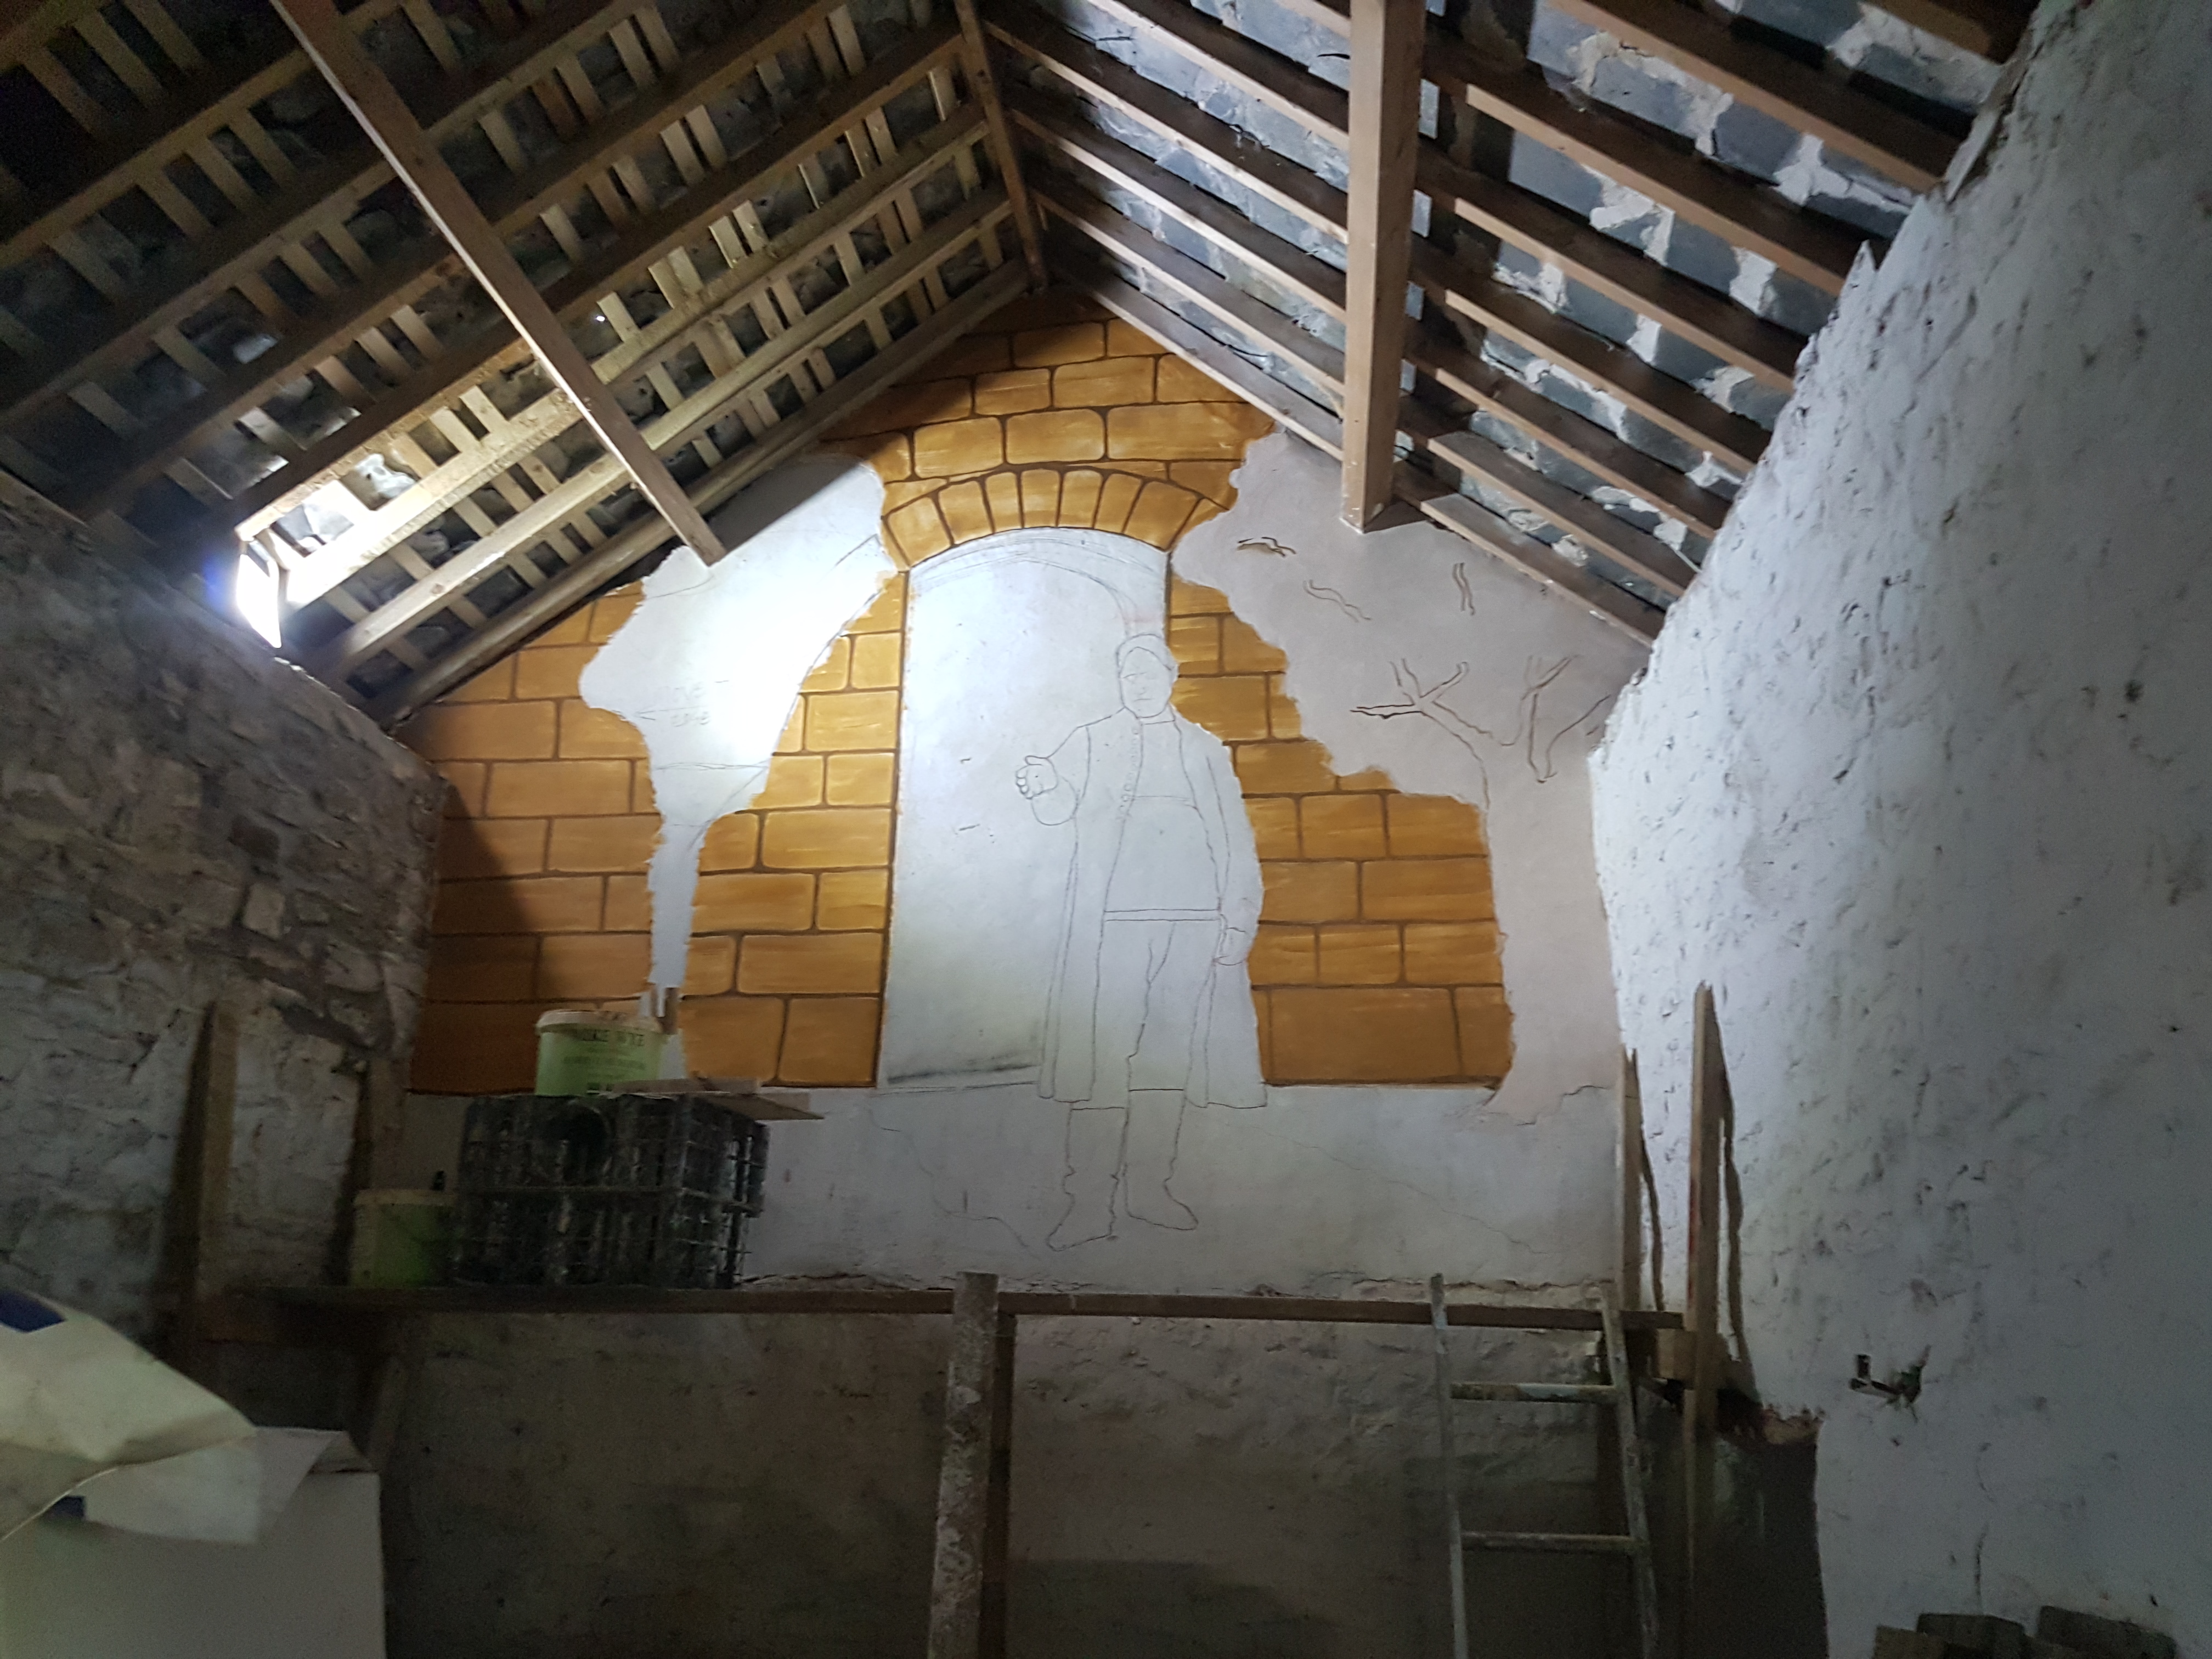
I was asked to create a wall painting of the Reverend Hawker in what was once a small store room next to the lych gate of Morwenstow church. It is rather a little more than a room with a fireplace and small bread oven. It was once used to prepare drowned shipwrecked sailors for burial.
It is 150 years since Reverend Hawker died and so it was decided that in commemoration this small building being used simply as a store for old tools and other rubbish would be repaired and turned into a bothy for people walking the south west coast path. It was felt that a wall painting of the Reverend would add something to the space.
The painting is done as a fresco – I did both the plastering and the painting and the reverend is life size and is rather an imposing figure as you walk in to what is quite a small space.
The fresco technique requires a good knowledge of lime plastering whilst at the same time you need to know about pigments and be able to paint. The painting has to be done whilst the top coat of lime plaster is still damp so that the unbound pigments soak in to the surface of the plaster and become locked in as it carbonates.
If any section needs redoing then it generally requires that the top coat of plaster be scraped off and reapplied. So careful marking out is required and you have to work reasonably quickly.
As this was my first attempt at anything ths size I kept it simple.
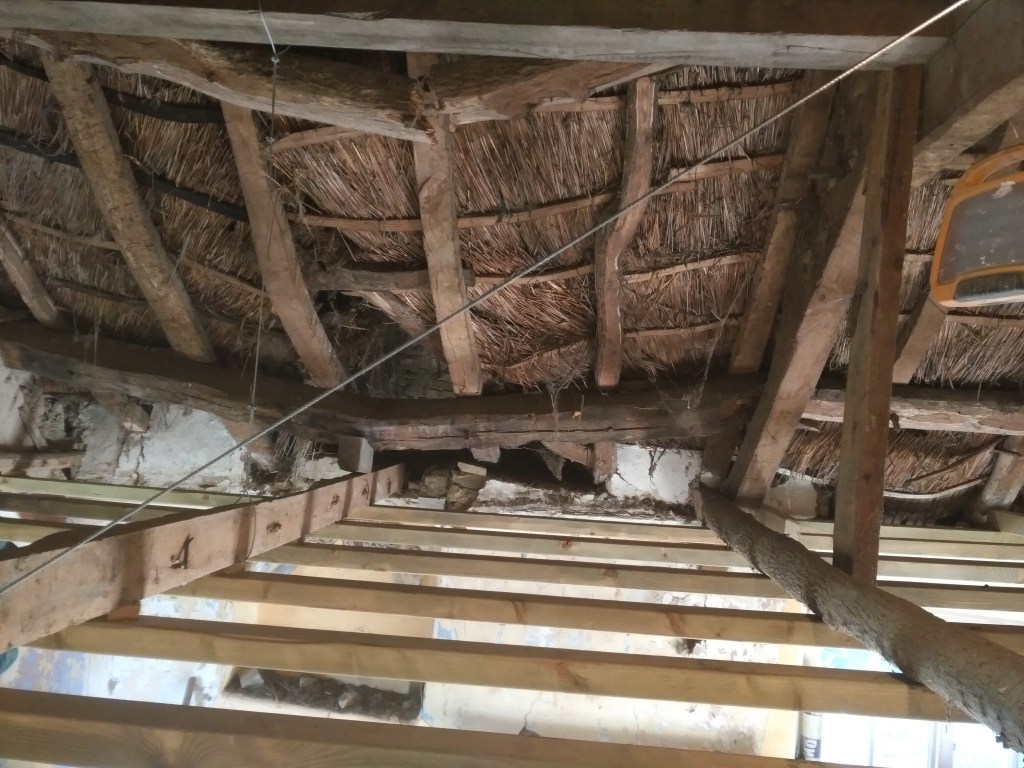
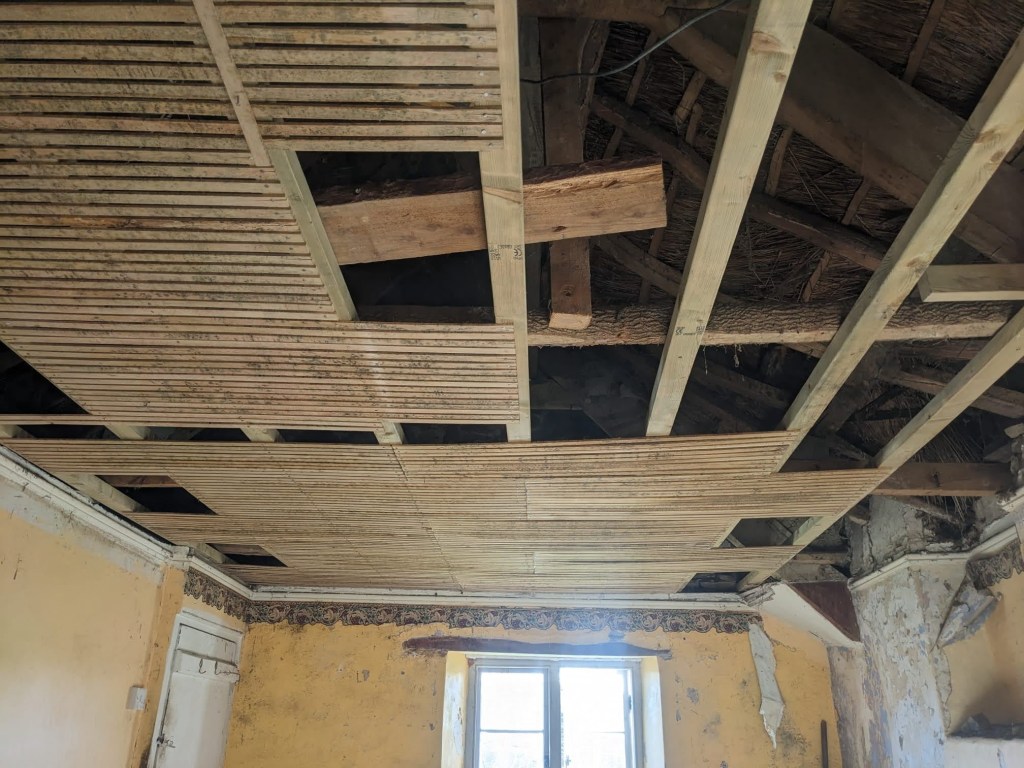
The project was to replace a collapsing lath and plaster ceiling. The plaster was earth and lime with inclusions of animal hair. The laths were worm eaten as were the rather thin joists, two inch square wood which could be easily snapped in half. There was a prominent sag in one of the cross beams and one of the purlins was broken and was propped with a thin tree branch, many of the timbers still had the bark on.
We turned the sagging cross beam on its side so it was flat, put in an oak beam to support the rafters which were very bowed and unsupported by the broken purlin. We replaced the joists, nailed on new oak laths and plastered them with locally gathered clay earth processed by being turned to slurry, passed through a 10 mm sieve and then mixed with quicklime and lime putty to bring it to the correct consistency before mixing that with sand and sheeps wool.
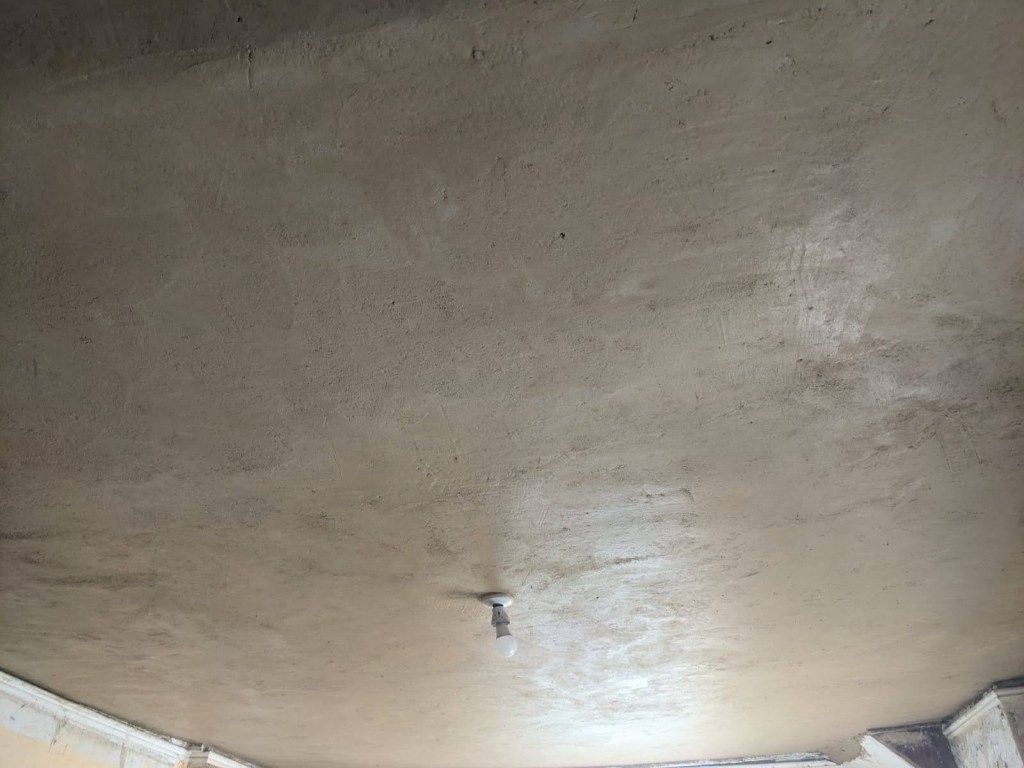
This earth and lime mortar was a joy to work with and we were easily able to plaster the ceiling in one coat before flattening and leaving it to dry before applying two thin coats of lime finishing plaster made from lime putty mixed with fine dredged river sand from the River Torridge.
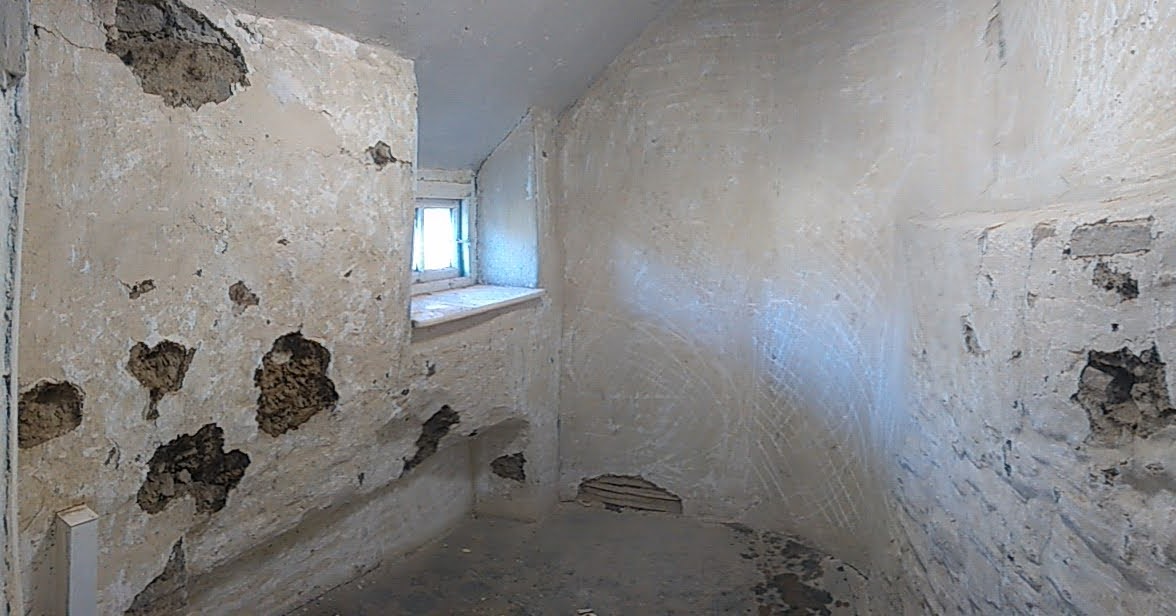
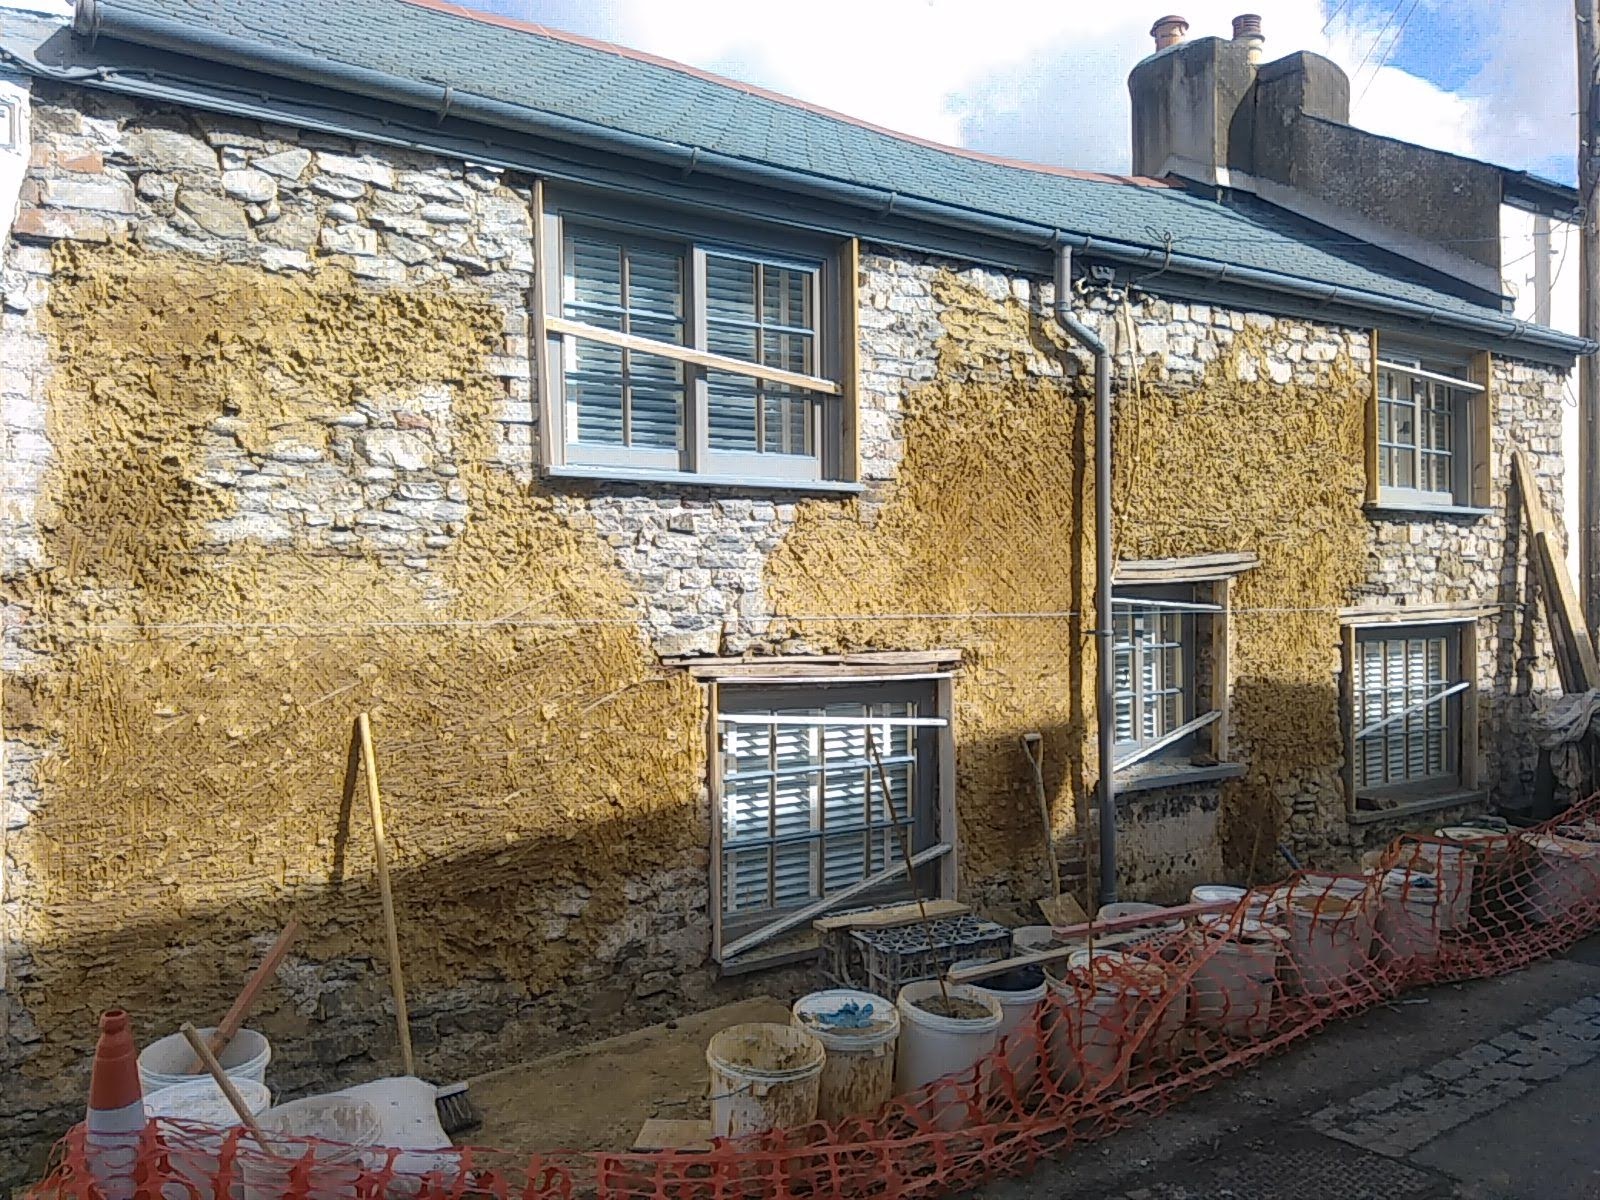
the cottage is built of stone and cob with lime and earth plasters that had been patched with gypsum, cement and lime at different periods. There are sections that have limewash on cob with lime plaster on top of that and then gypsum plaster on top of that. Planty of the plaster was loose and crumbling but the majority was sound and the customer wanted to keep the costs down by repairing the plaster rather than replacing it.
We decided to plaster with earth/lime plasters reinforced with chopped straw and to skim over everything with my own recipes of lime putty and fine sand reinforced with lots of animal fibre – in this case we used chopped sheeps wool which worked really well.
The skimming was done in three coats – two thin coats of a mix comprising 2mm sharp sand mixed with lime putty and sheeps wool applied wet on wet and trowelled smooth – nothing was flat, far from it, the walls are very undulating – the important thing is to compact the plaster. On top of that, when it had sufficiently dried, was applied a coat of my own recipe fine lime plaster again trowelled smooth and compacted. A slight texture was created with a sponge and the intention is to paint it with soft distemper.
This little room had lime washed lime plaster walls, many patches were crumbling away and the limewash was flaking off but overall the plaster was sound. I decided to keep as much as possible and carry out conservative repairs.
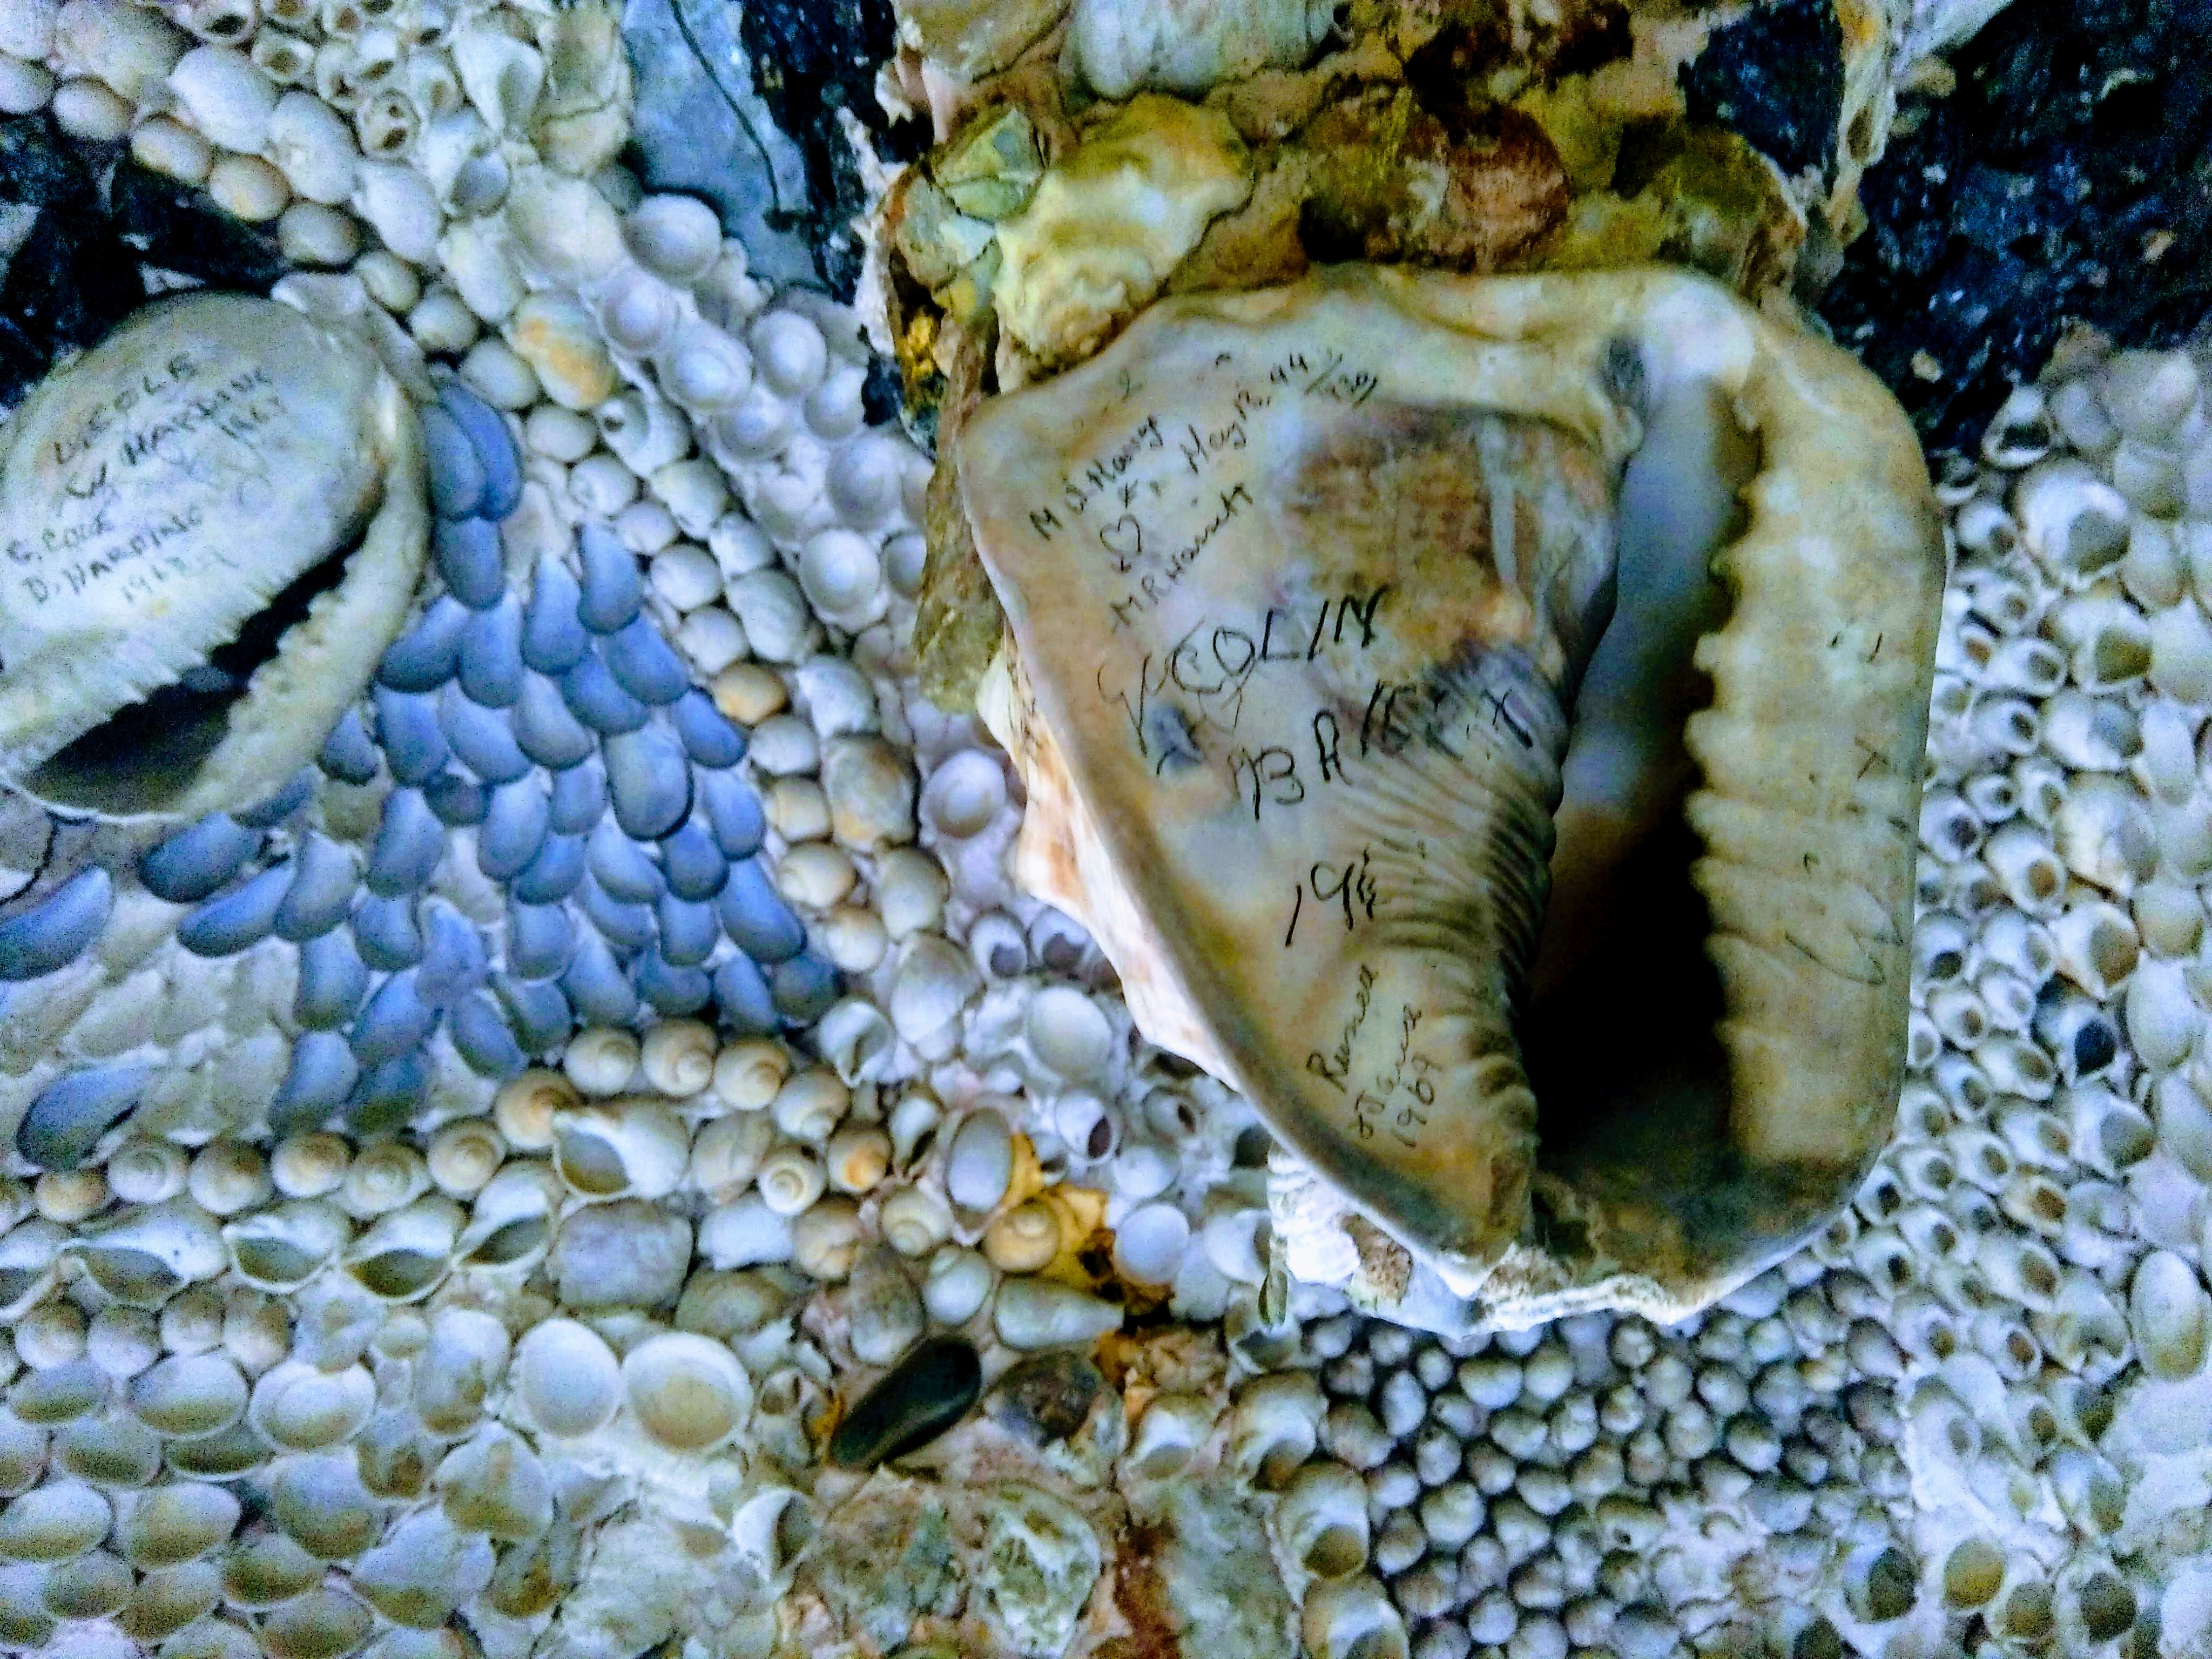
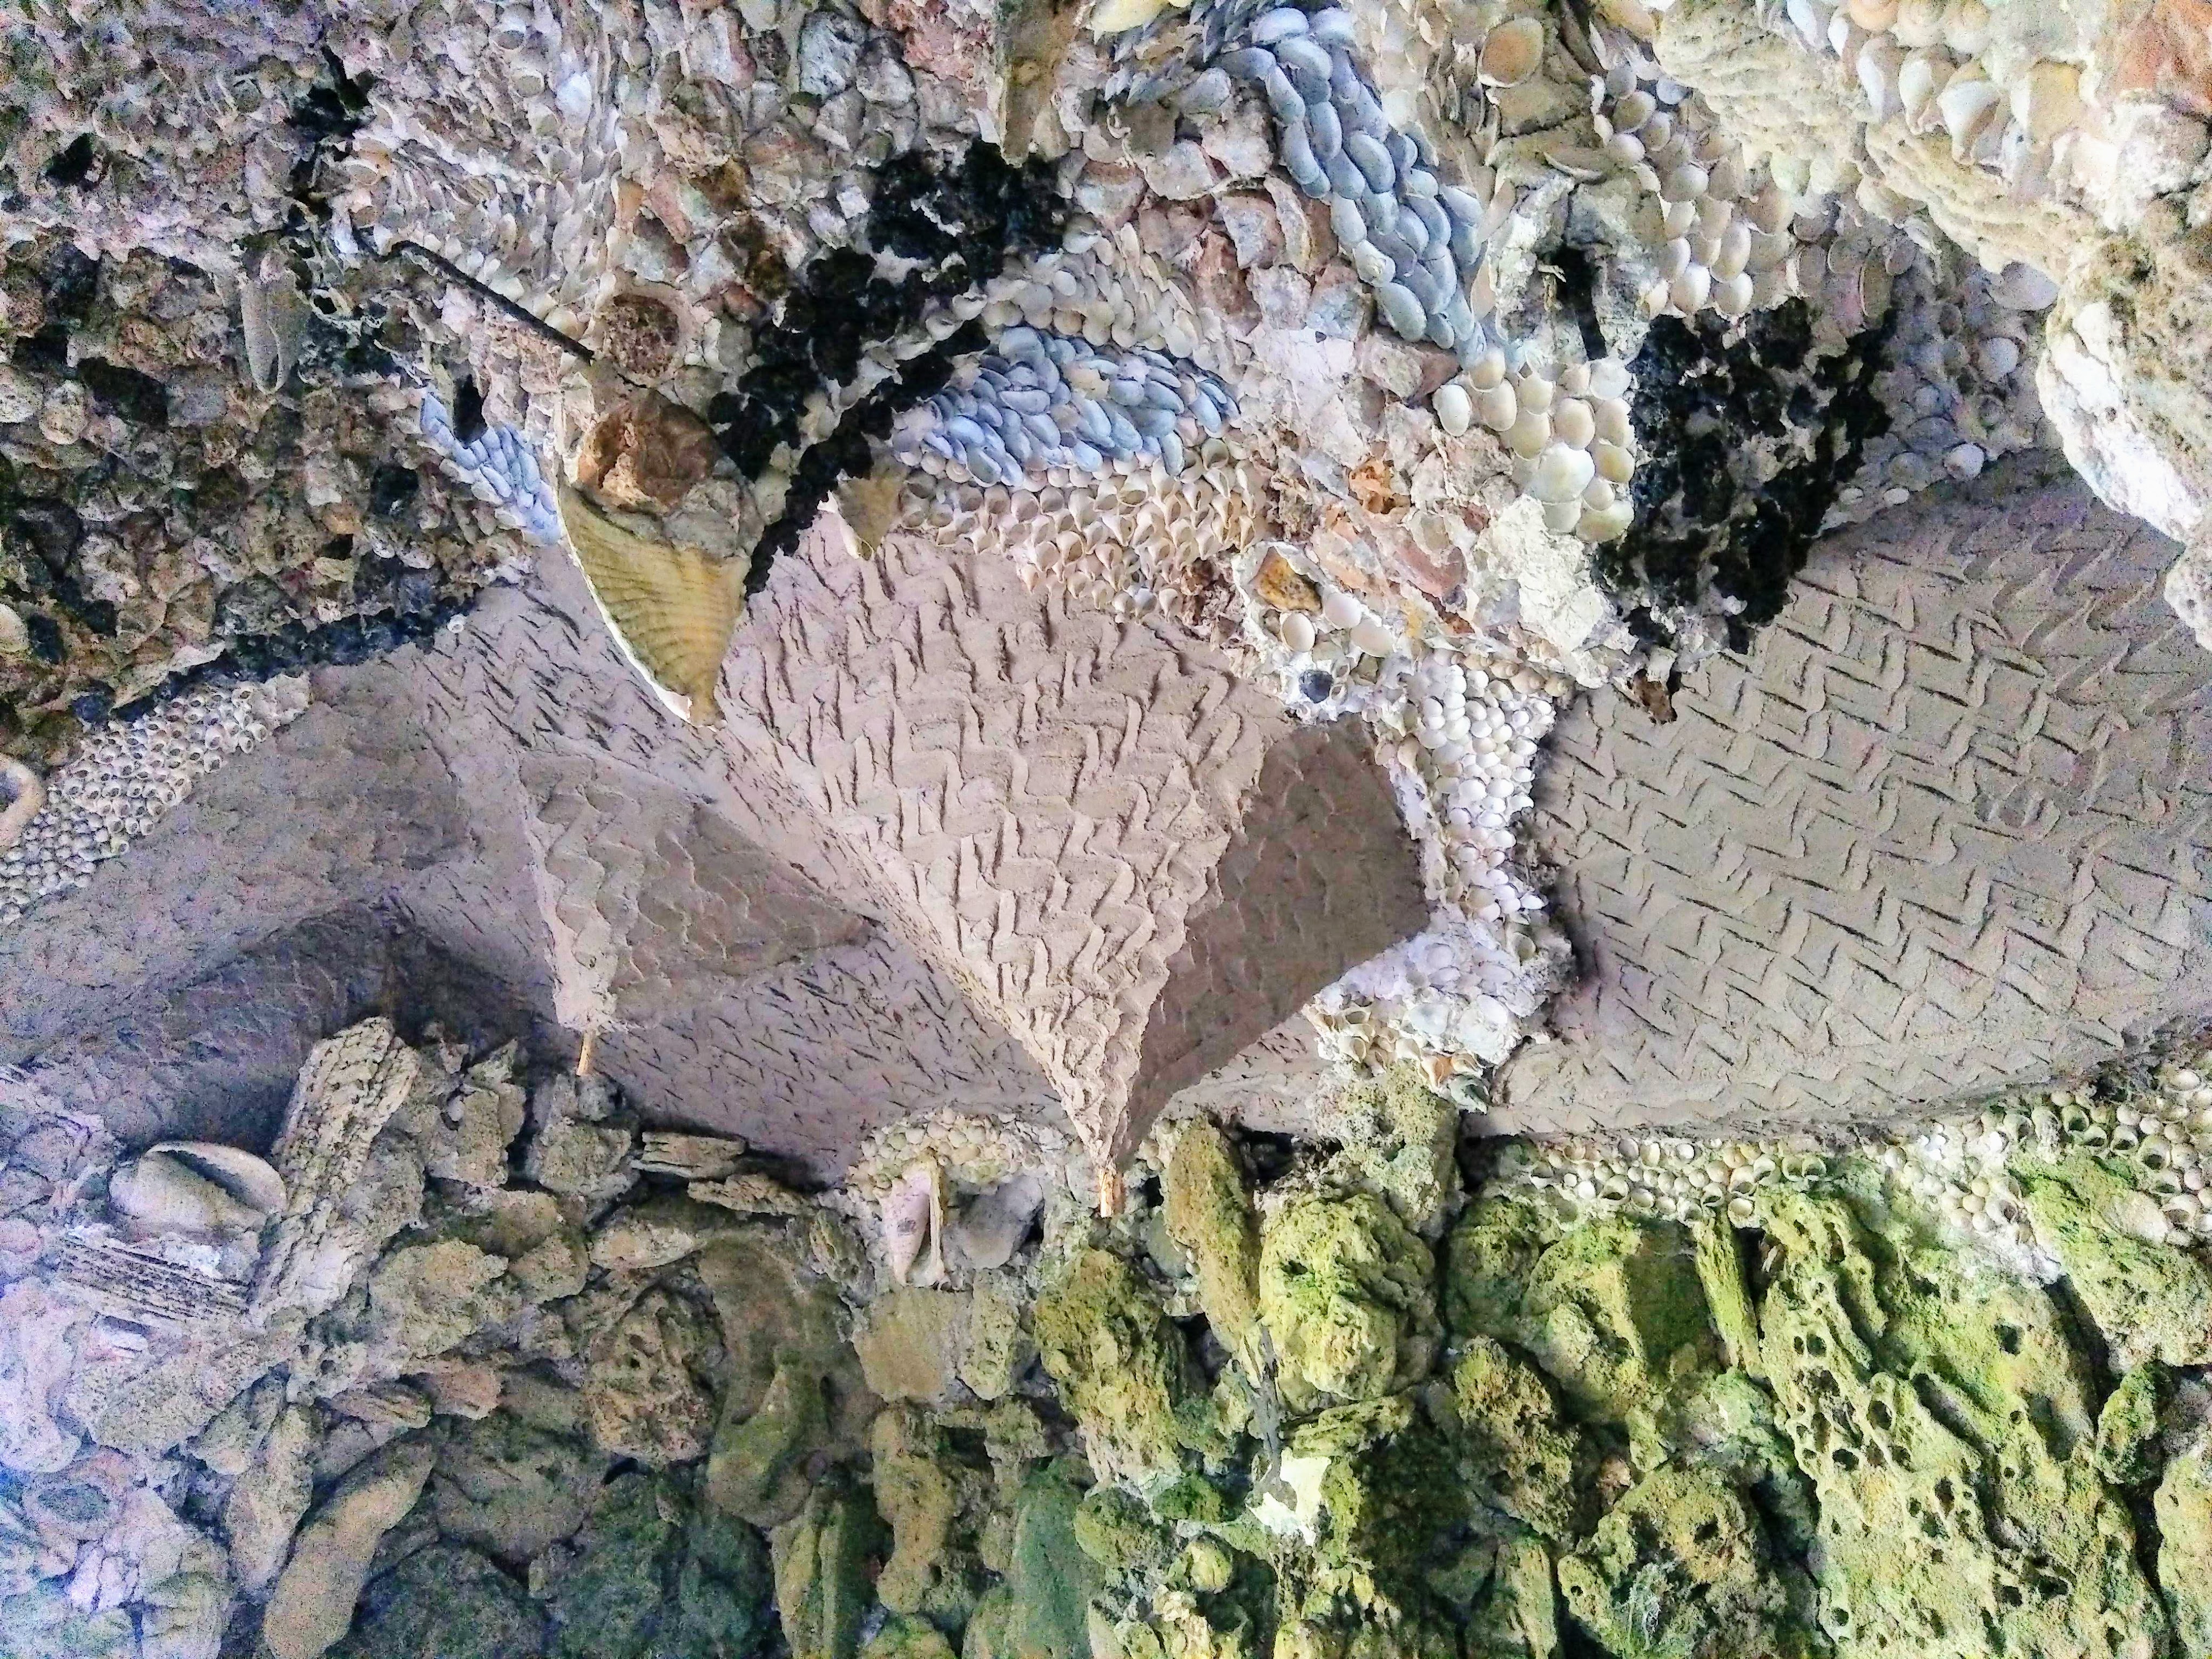
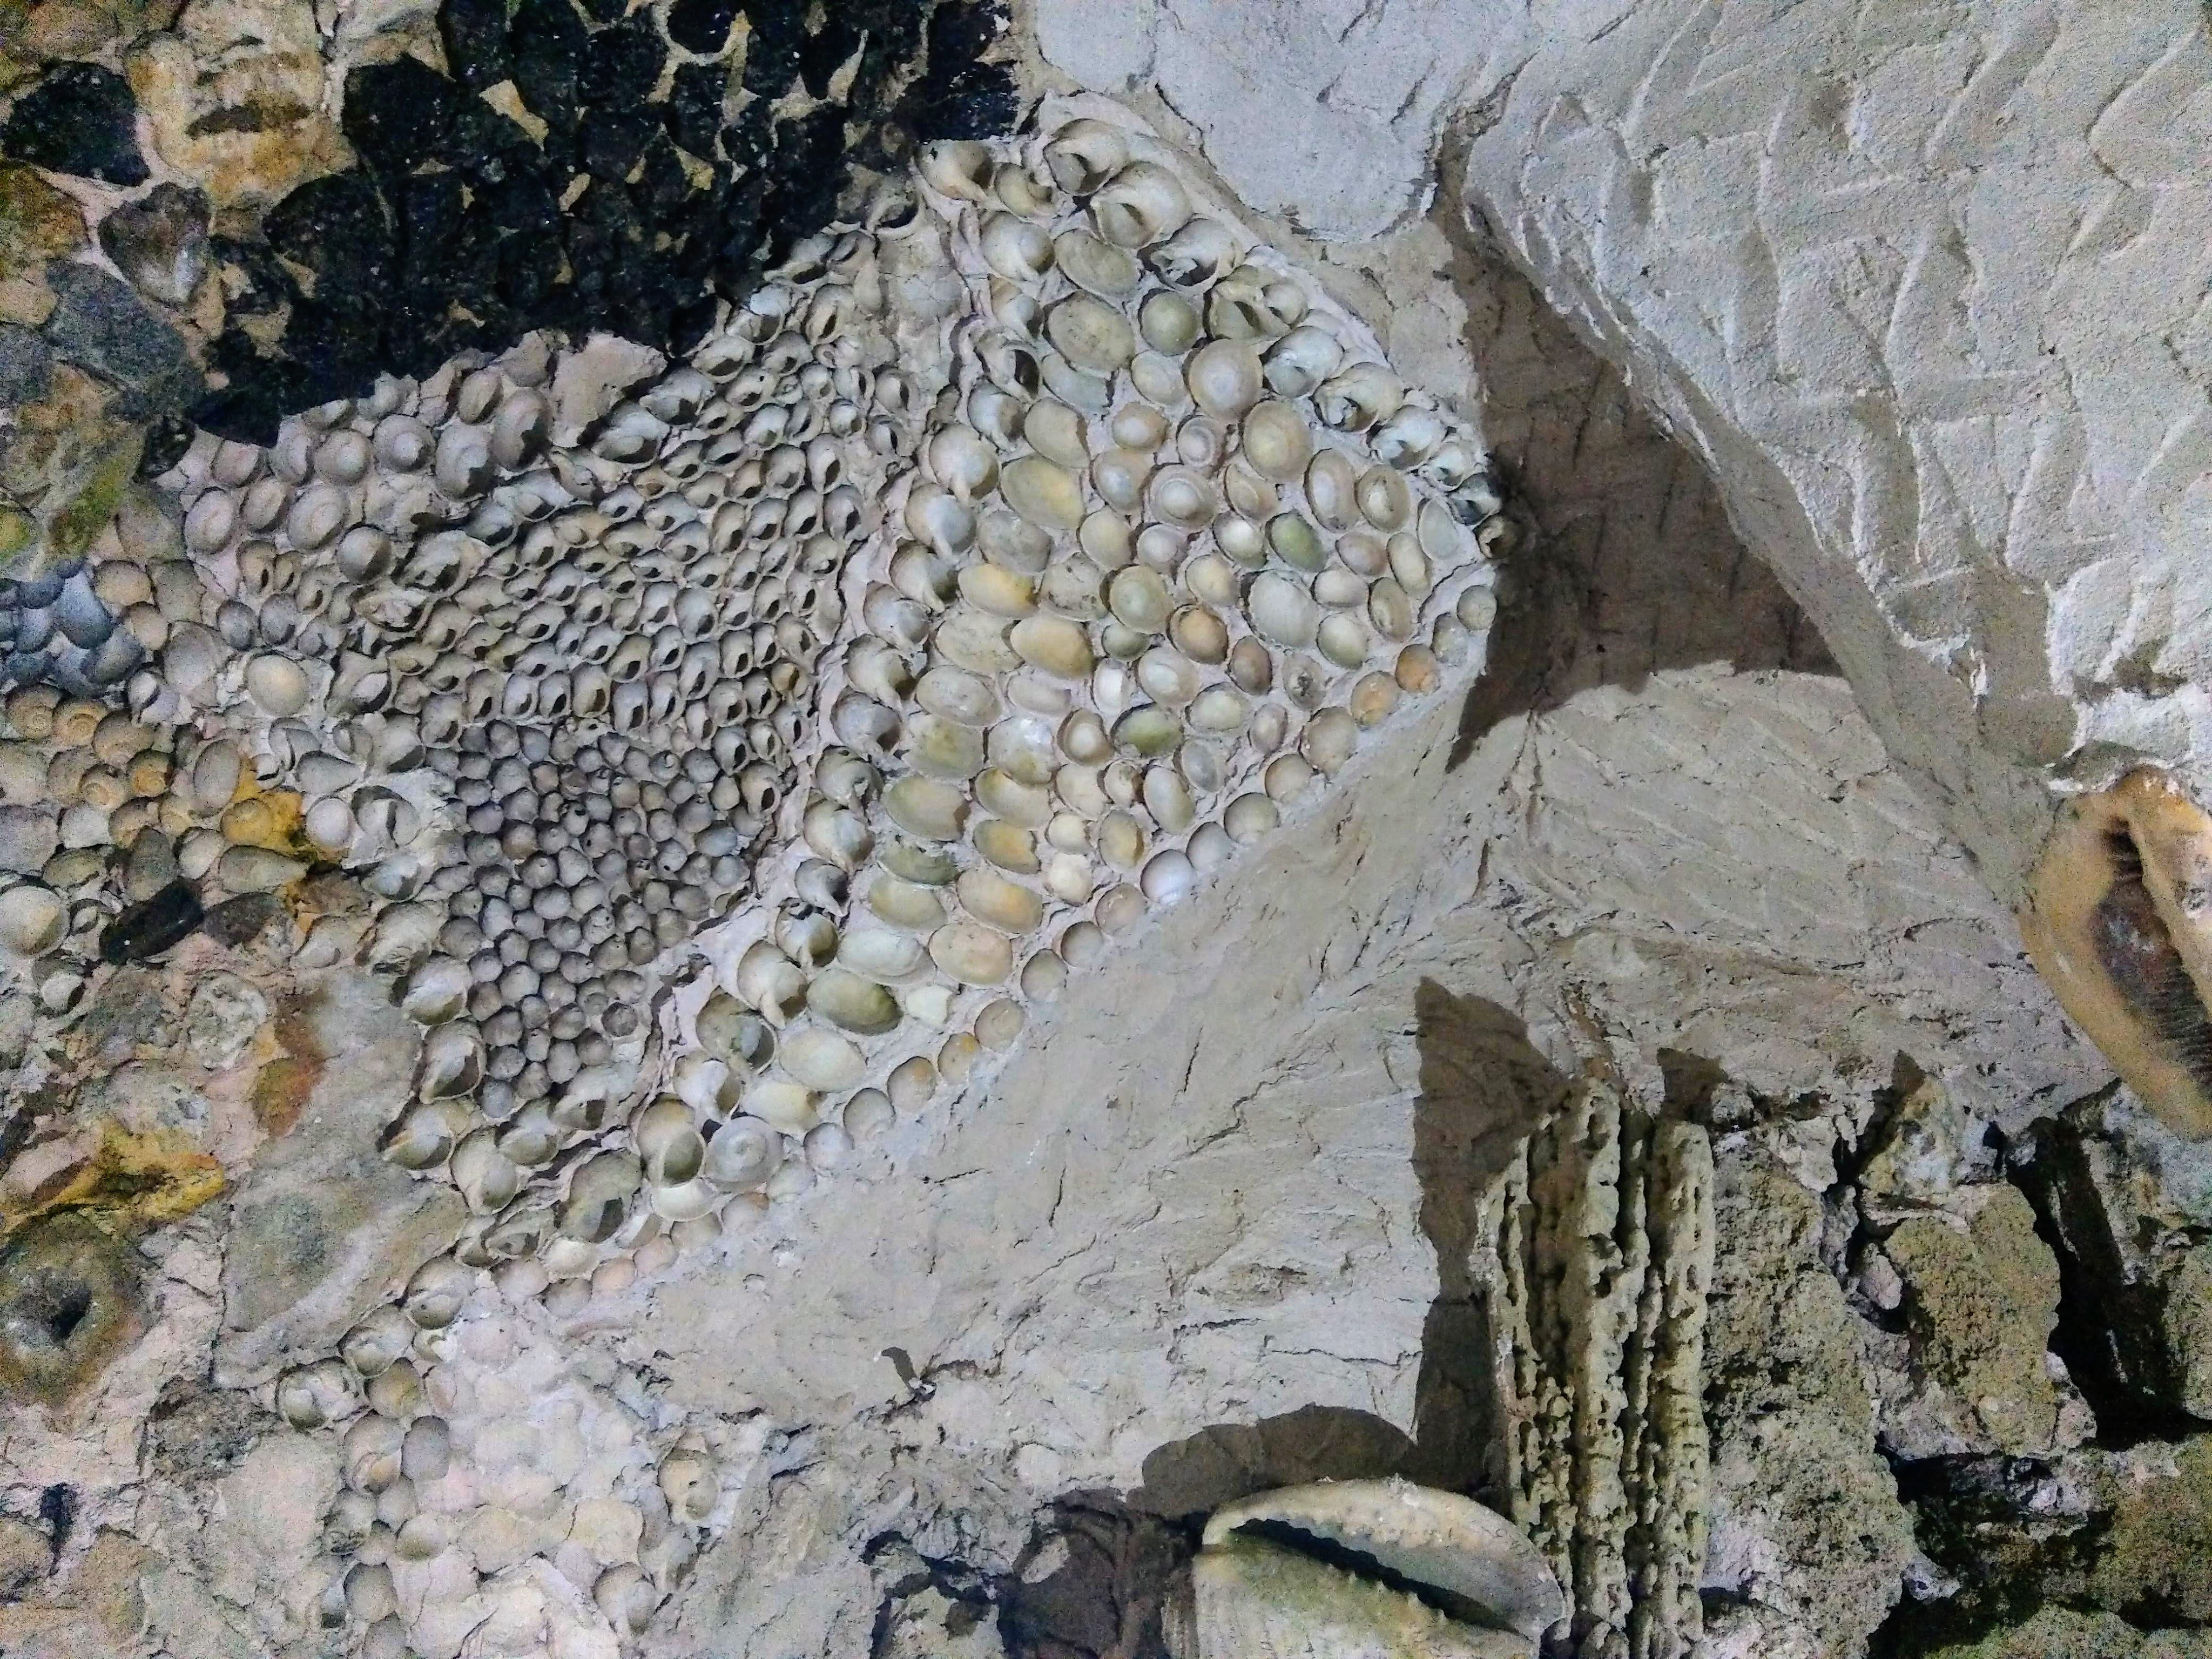
I had the opportunity to repair a shell grotto. The ceiling had collapsed in places due to a leaky roof so after the roof was repaired I got to work fixing new lath armatures for the missing stalactites.
All the shells were rescued from the fallen plaster and reused. The pattern of shell mosaic appeared to follow a regular style, with the different shells – cockles, mussels, whelks, periwinkles, oysters and limpets – all used in the same way throughout the existing undamaged ceiling, all I did was create my own interpretation following the existing pattern.
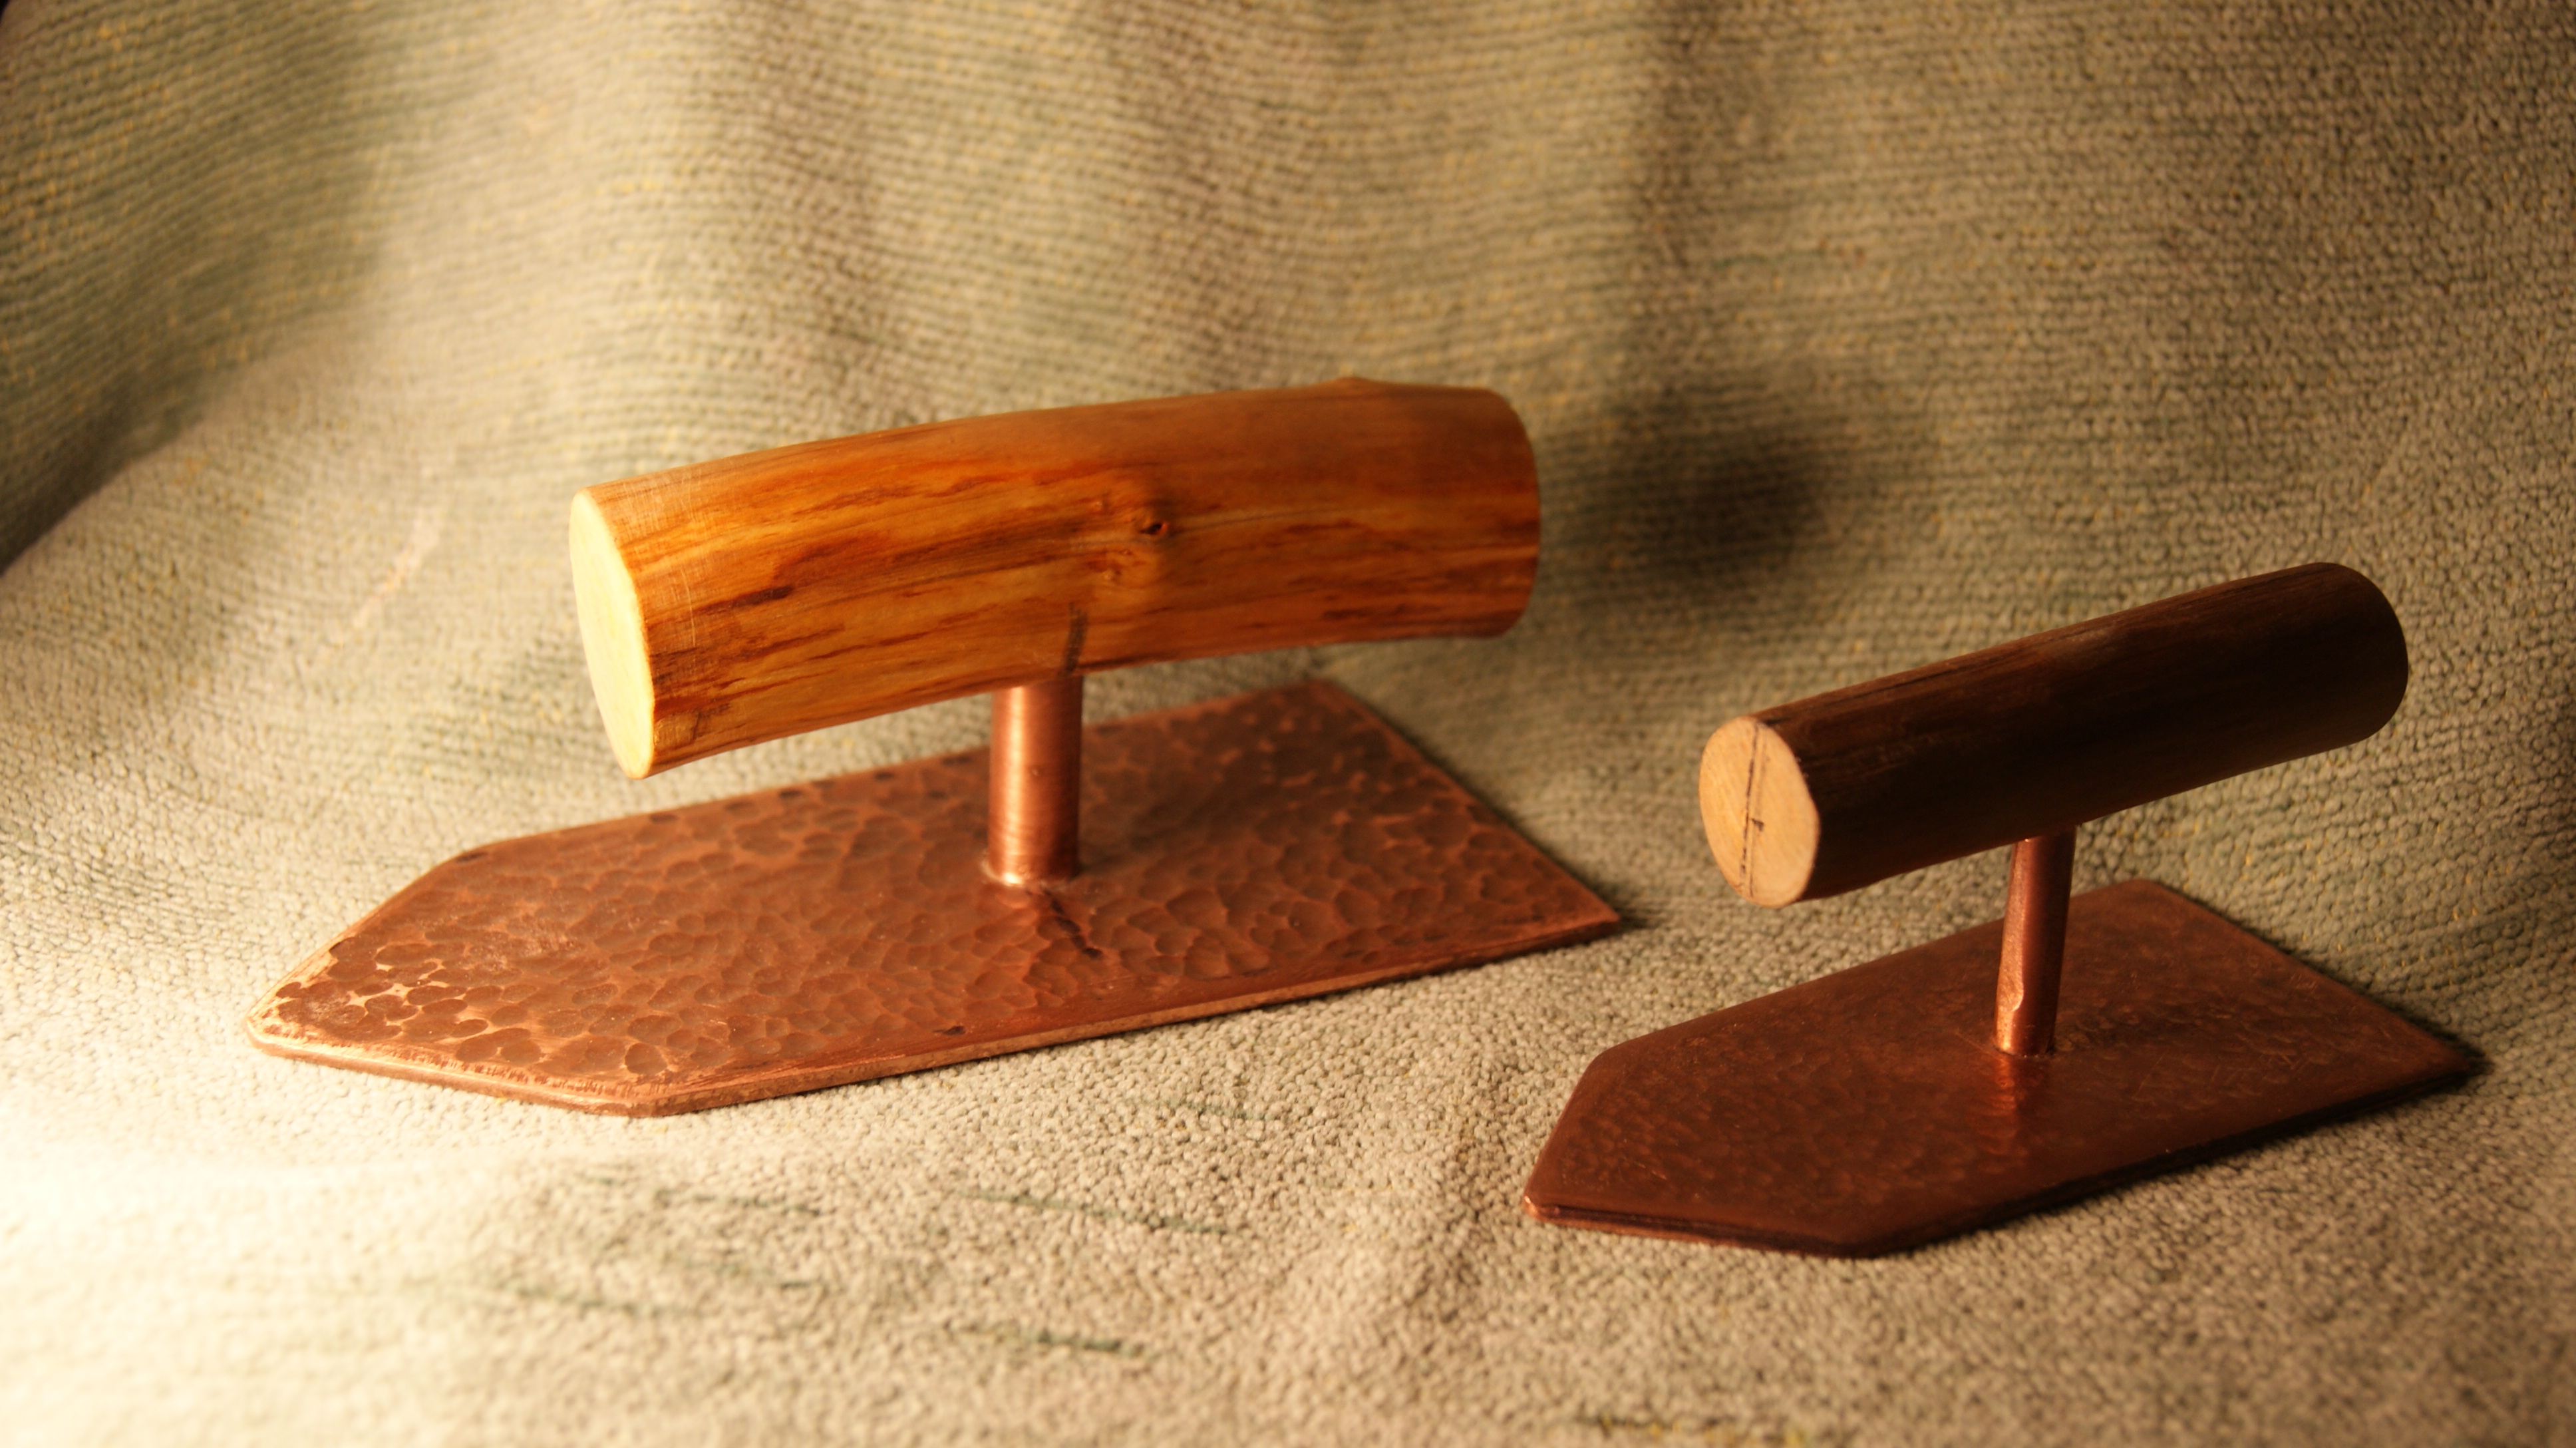
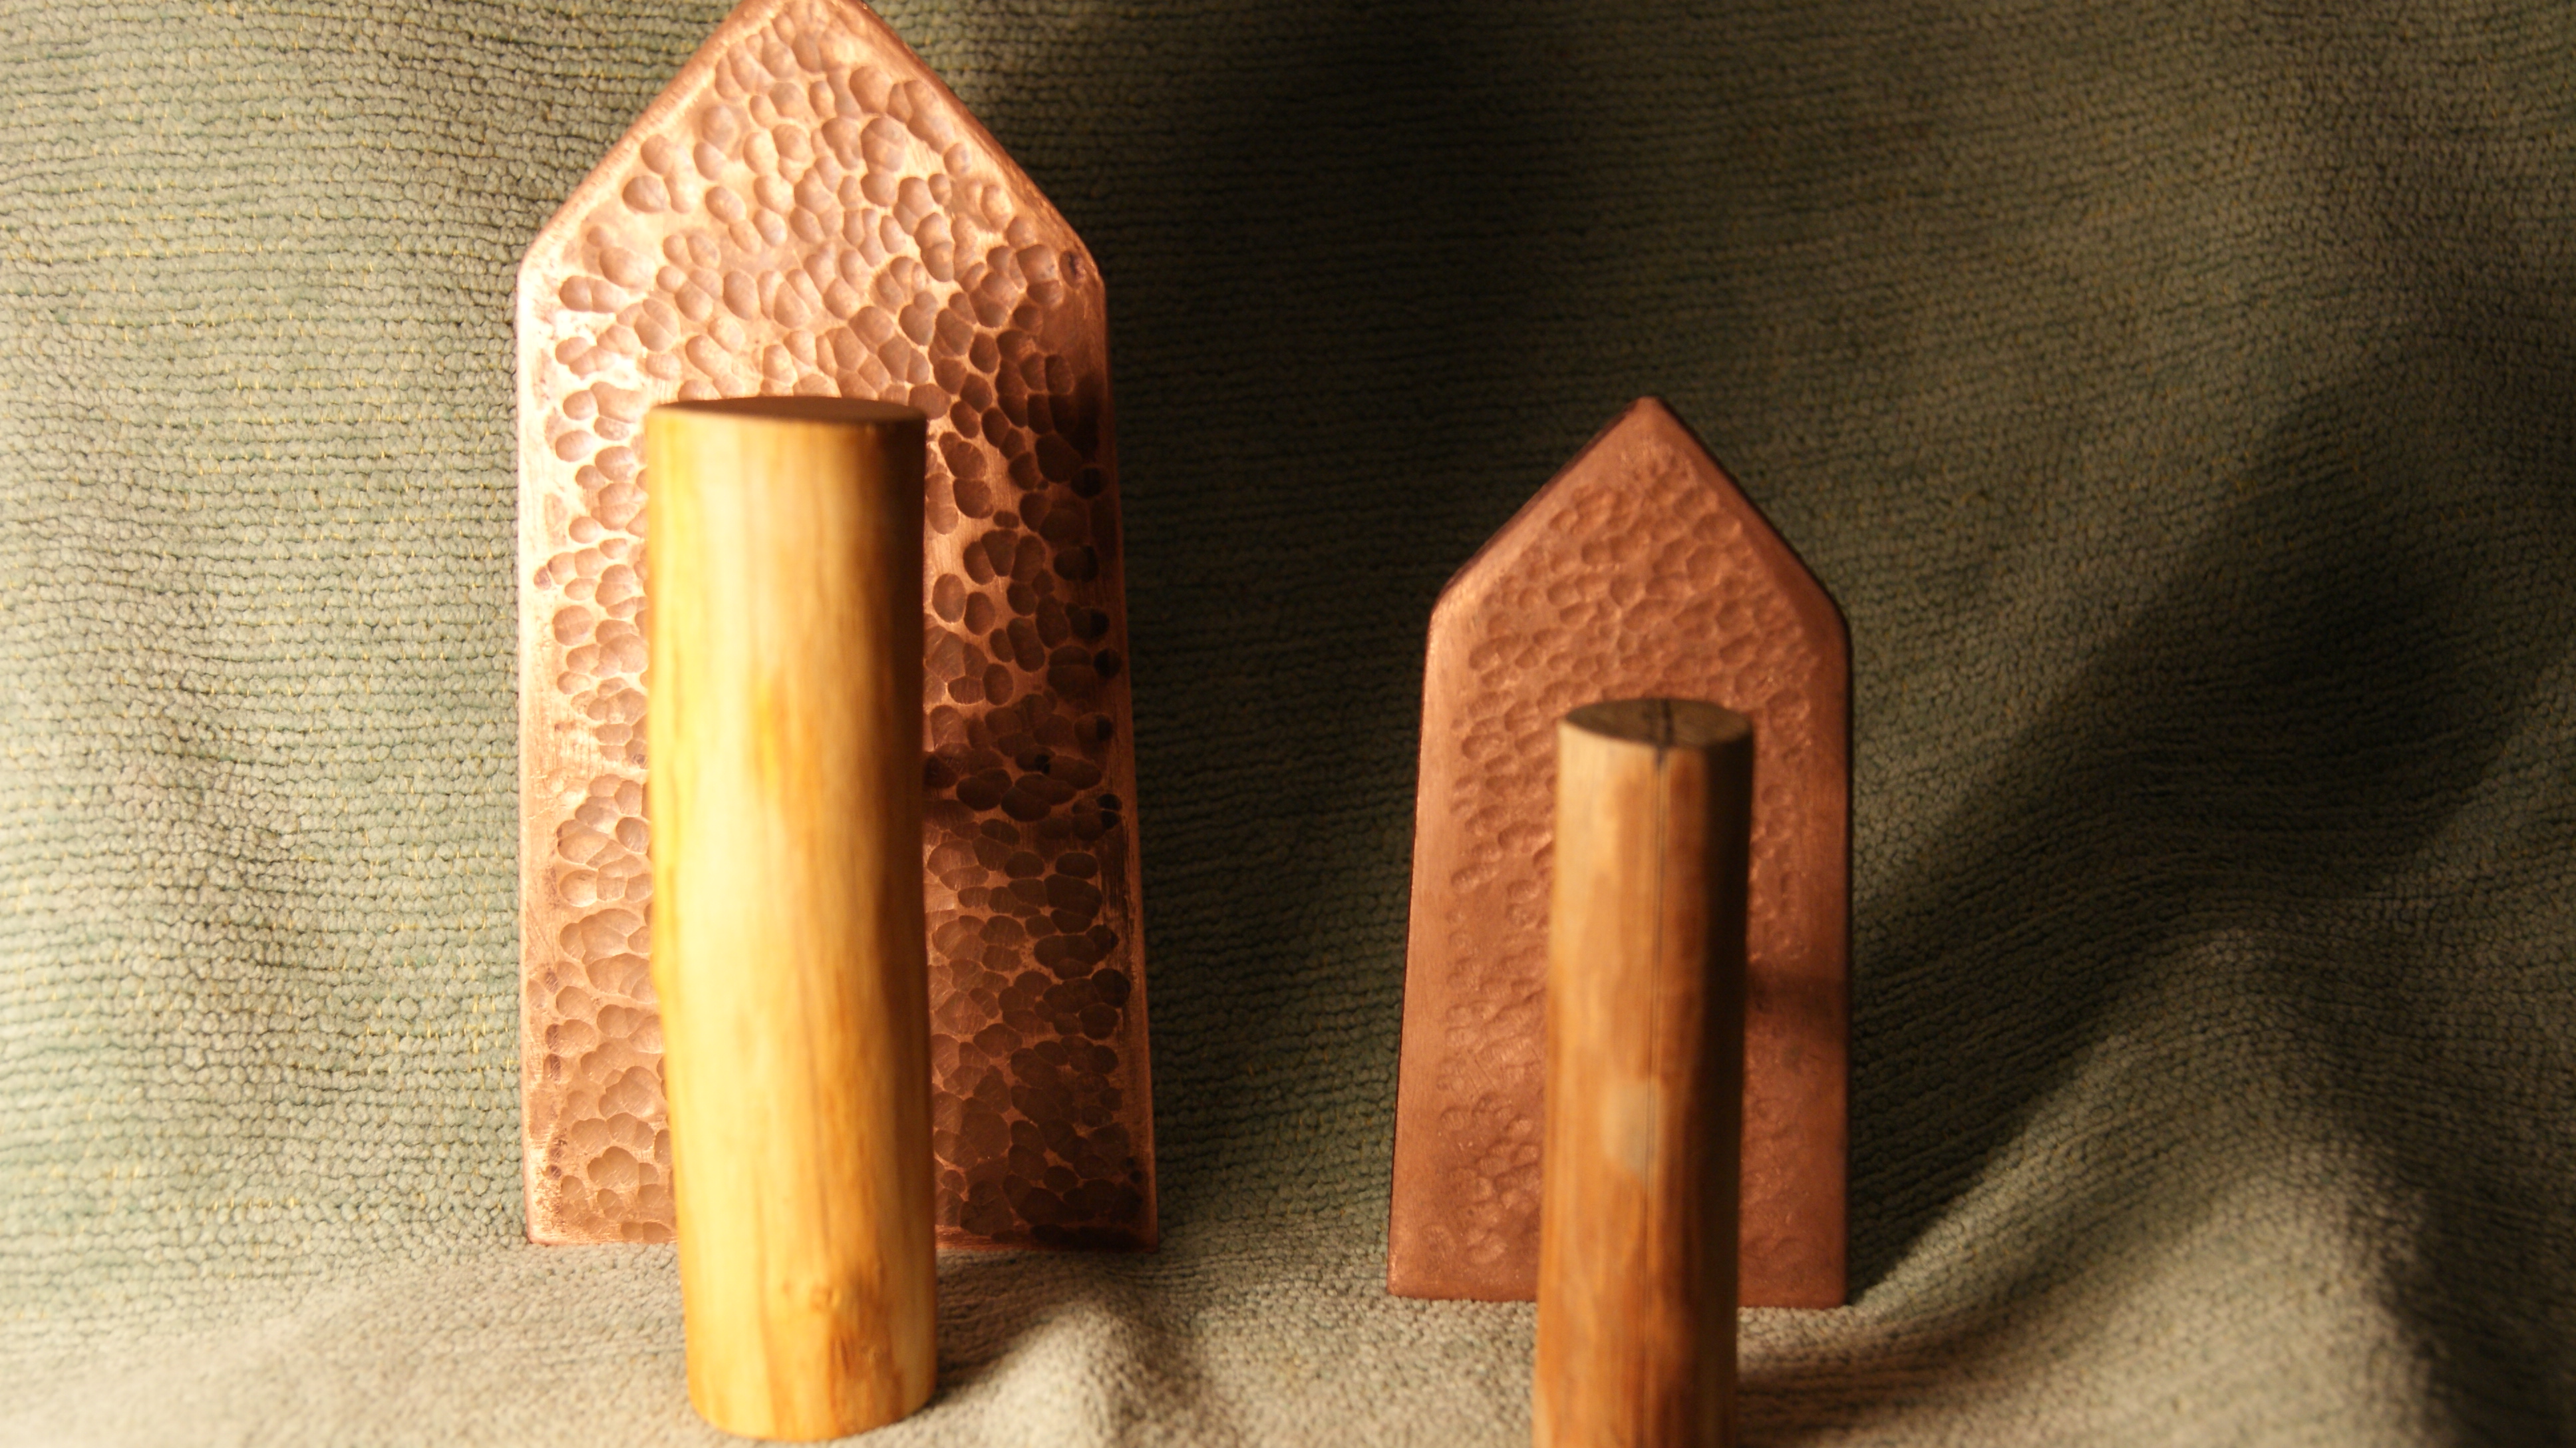
Having spent time wondering what sort of trowels might have been used in antiquity, not having seen any in any of the many museums that I have been in, I simply reasoned that some might have been made from copper and so decided to make myself one or two to find out how they perform
They are made from 3mm copper sheet with apple wood handles.
Not all sheds need be built of timber, not all sheds need be clad with timber.
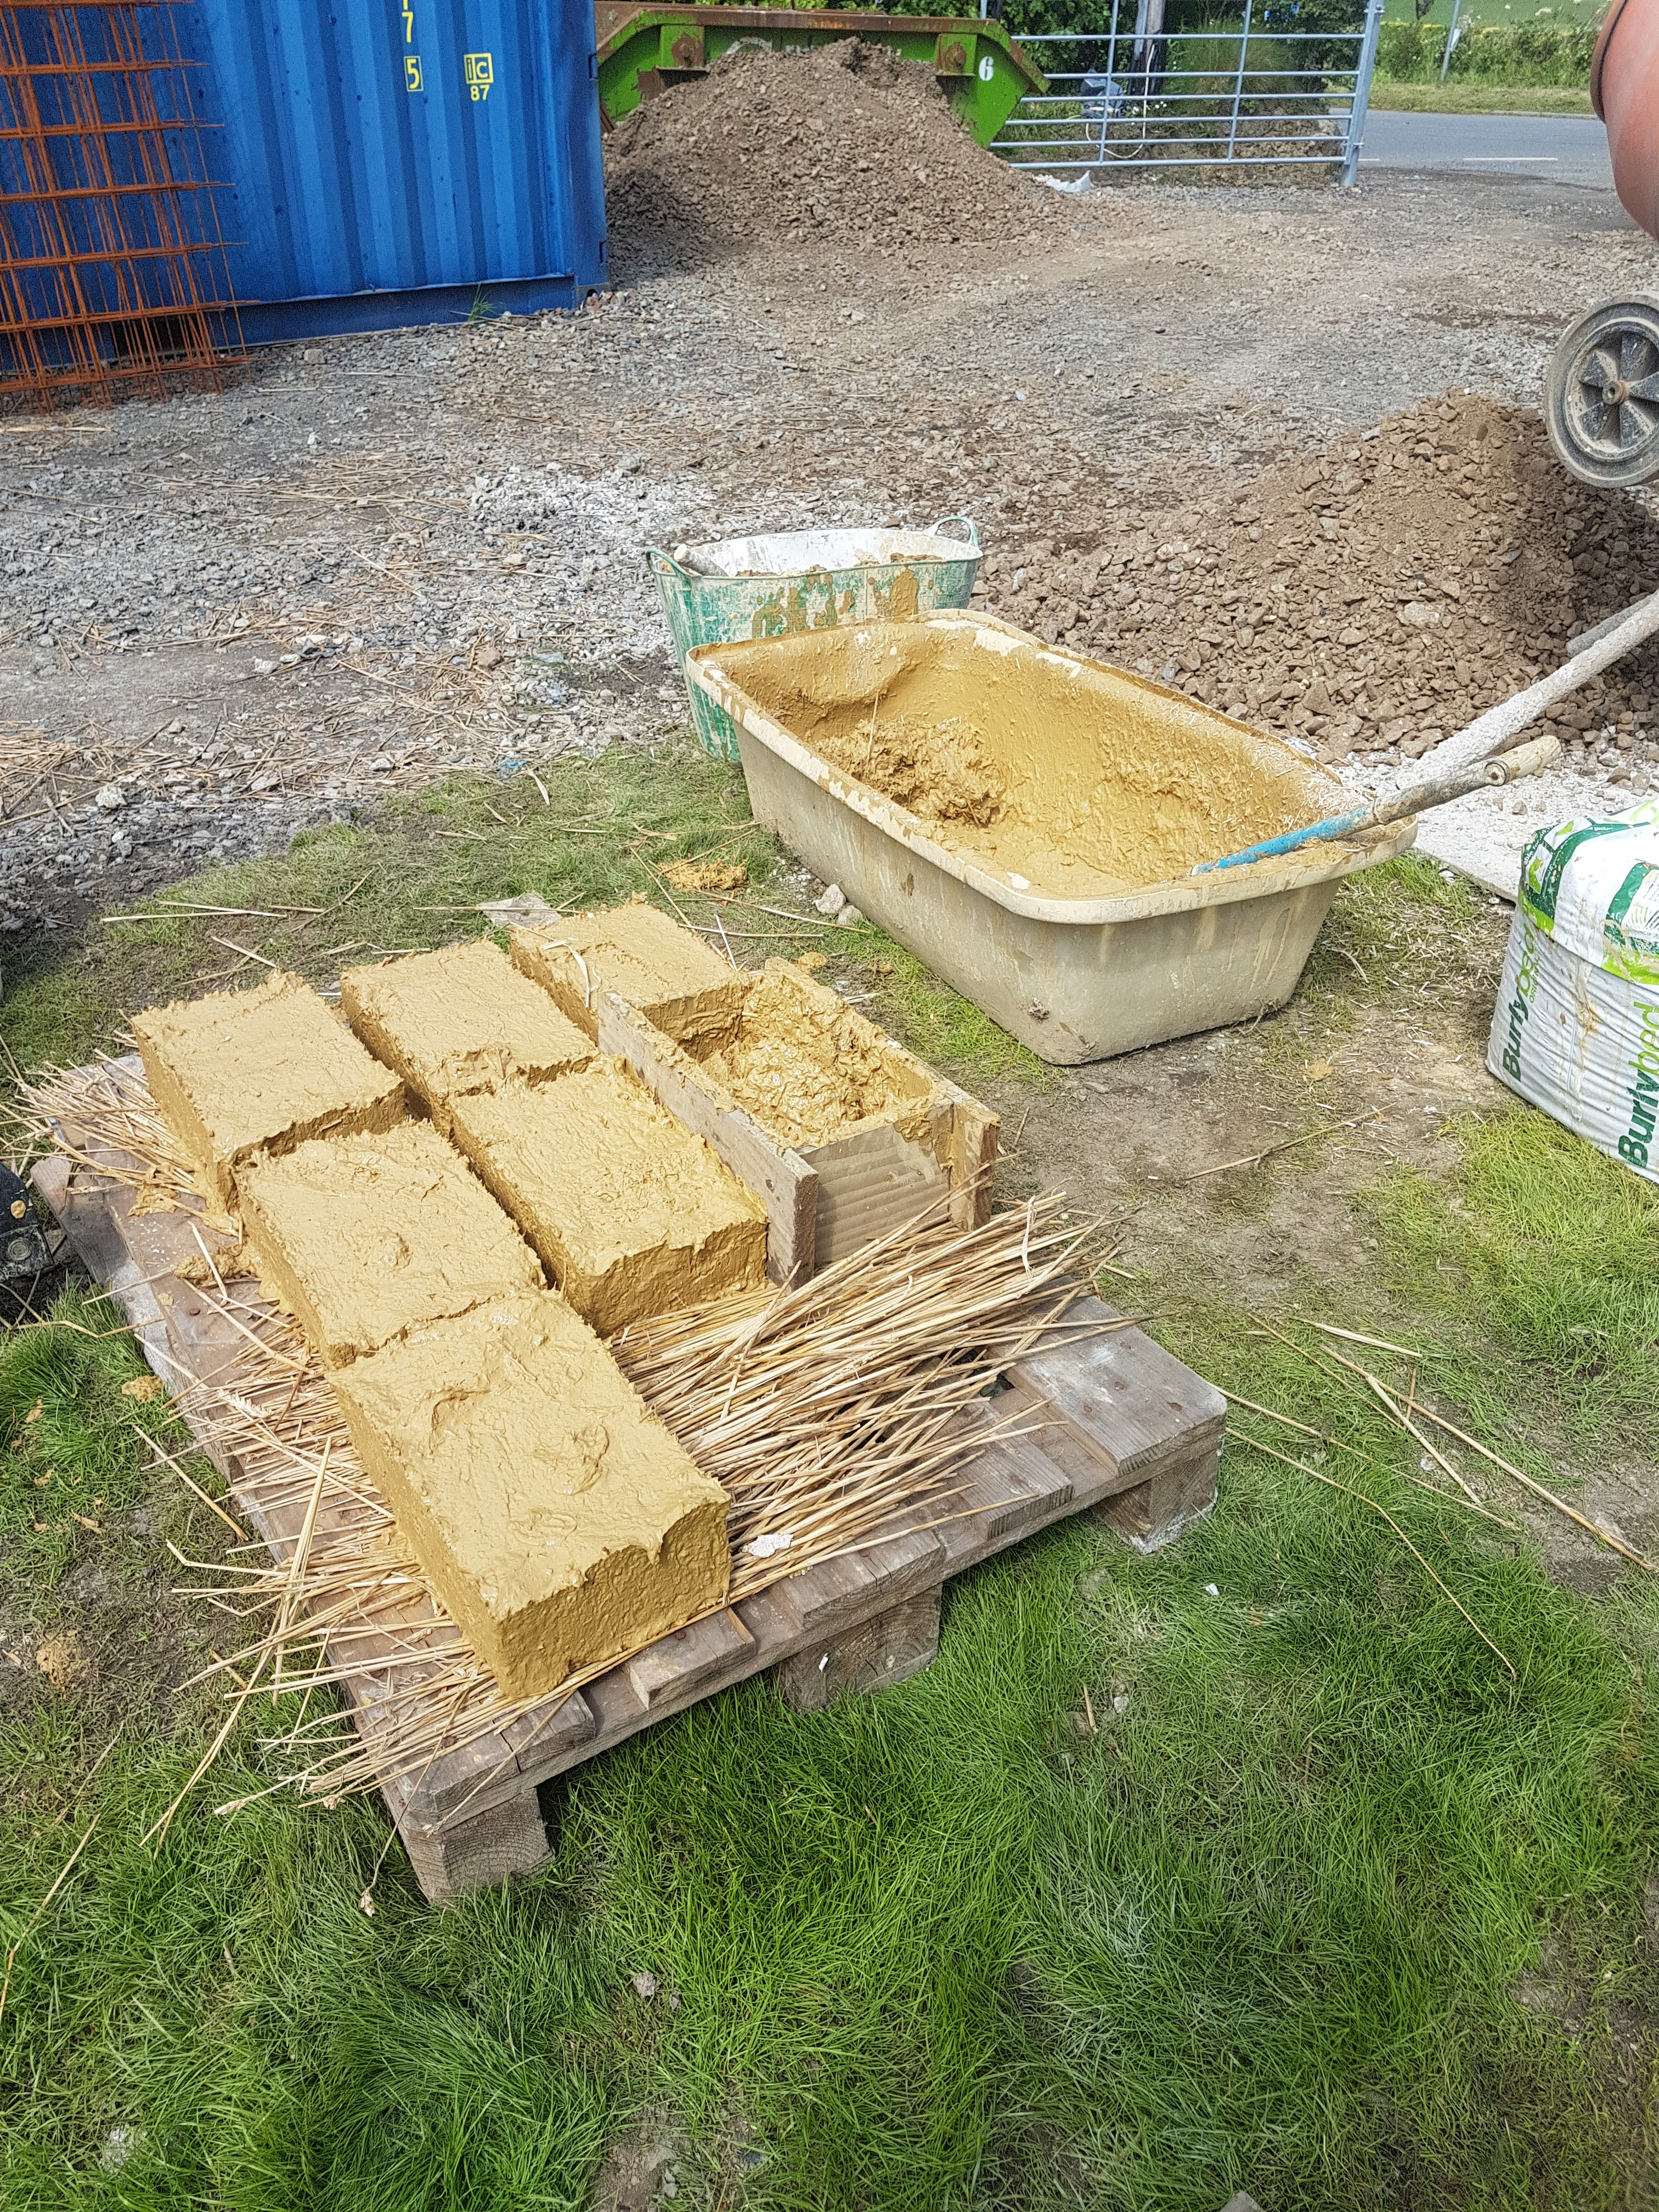
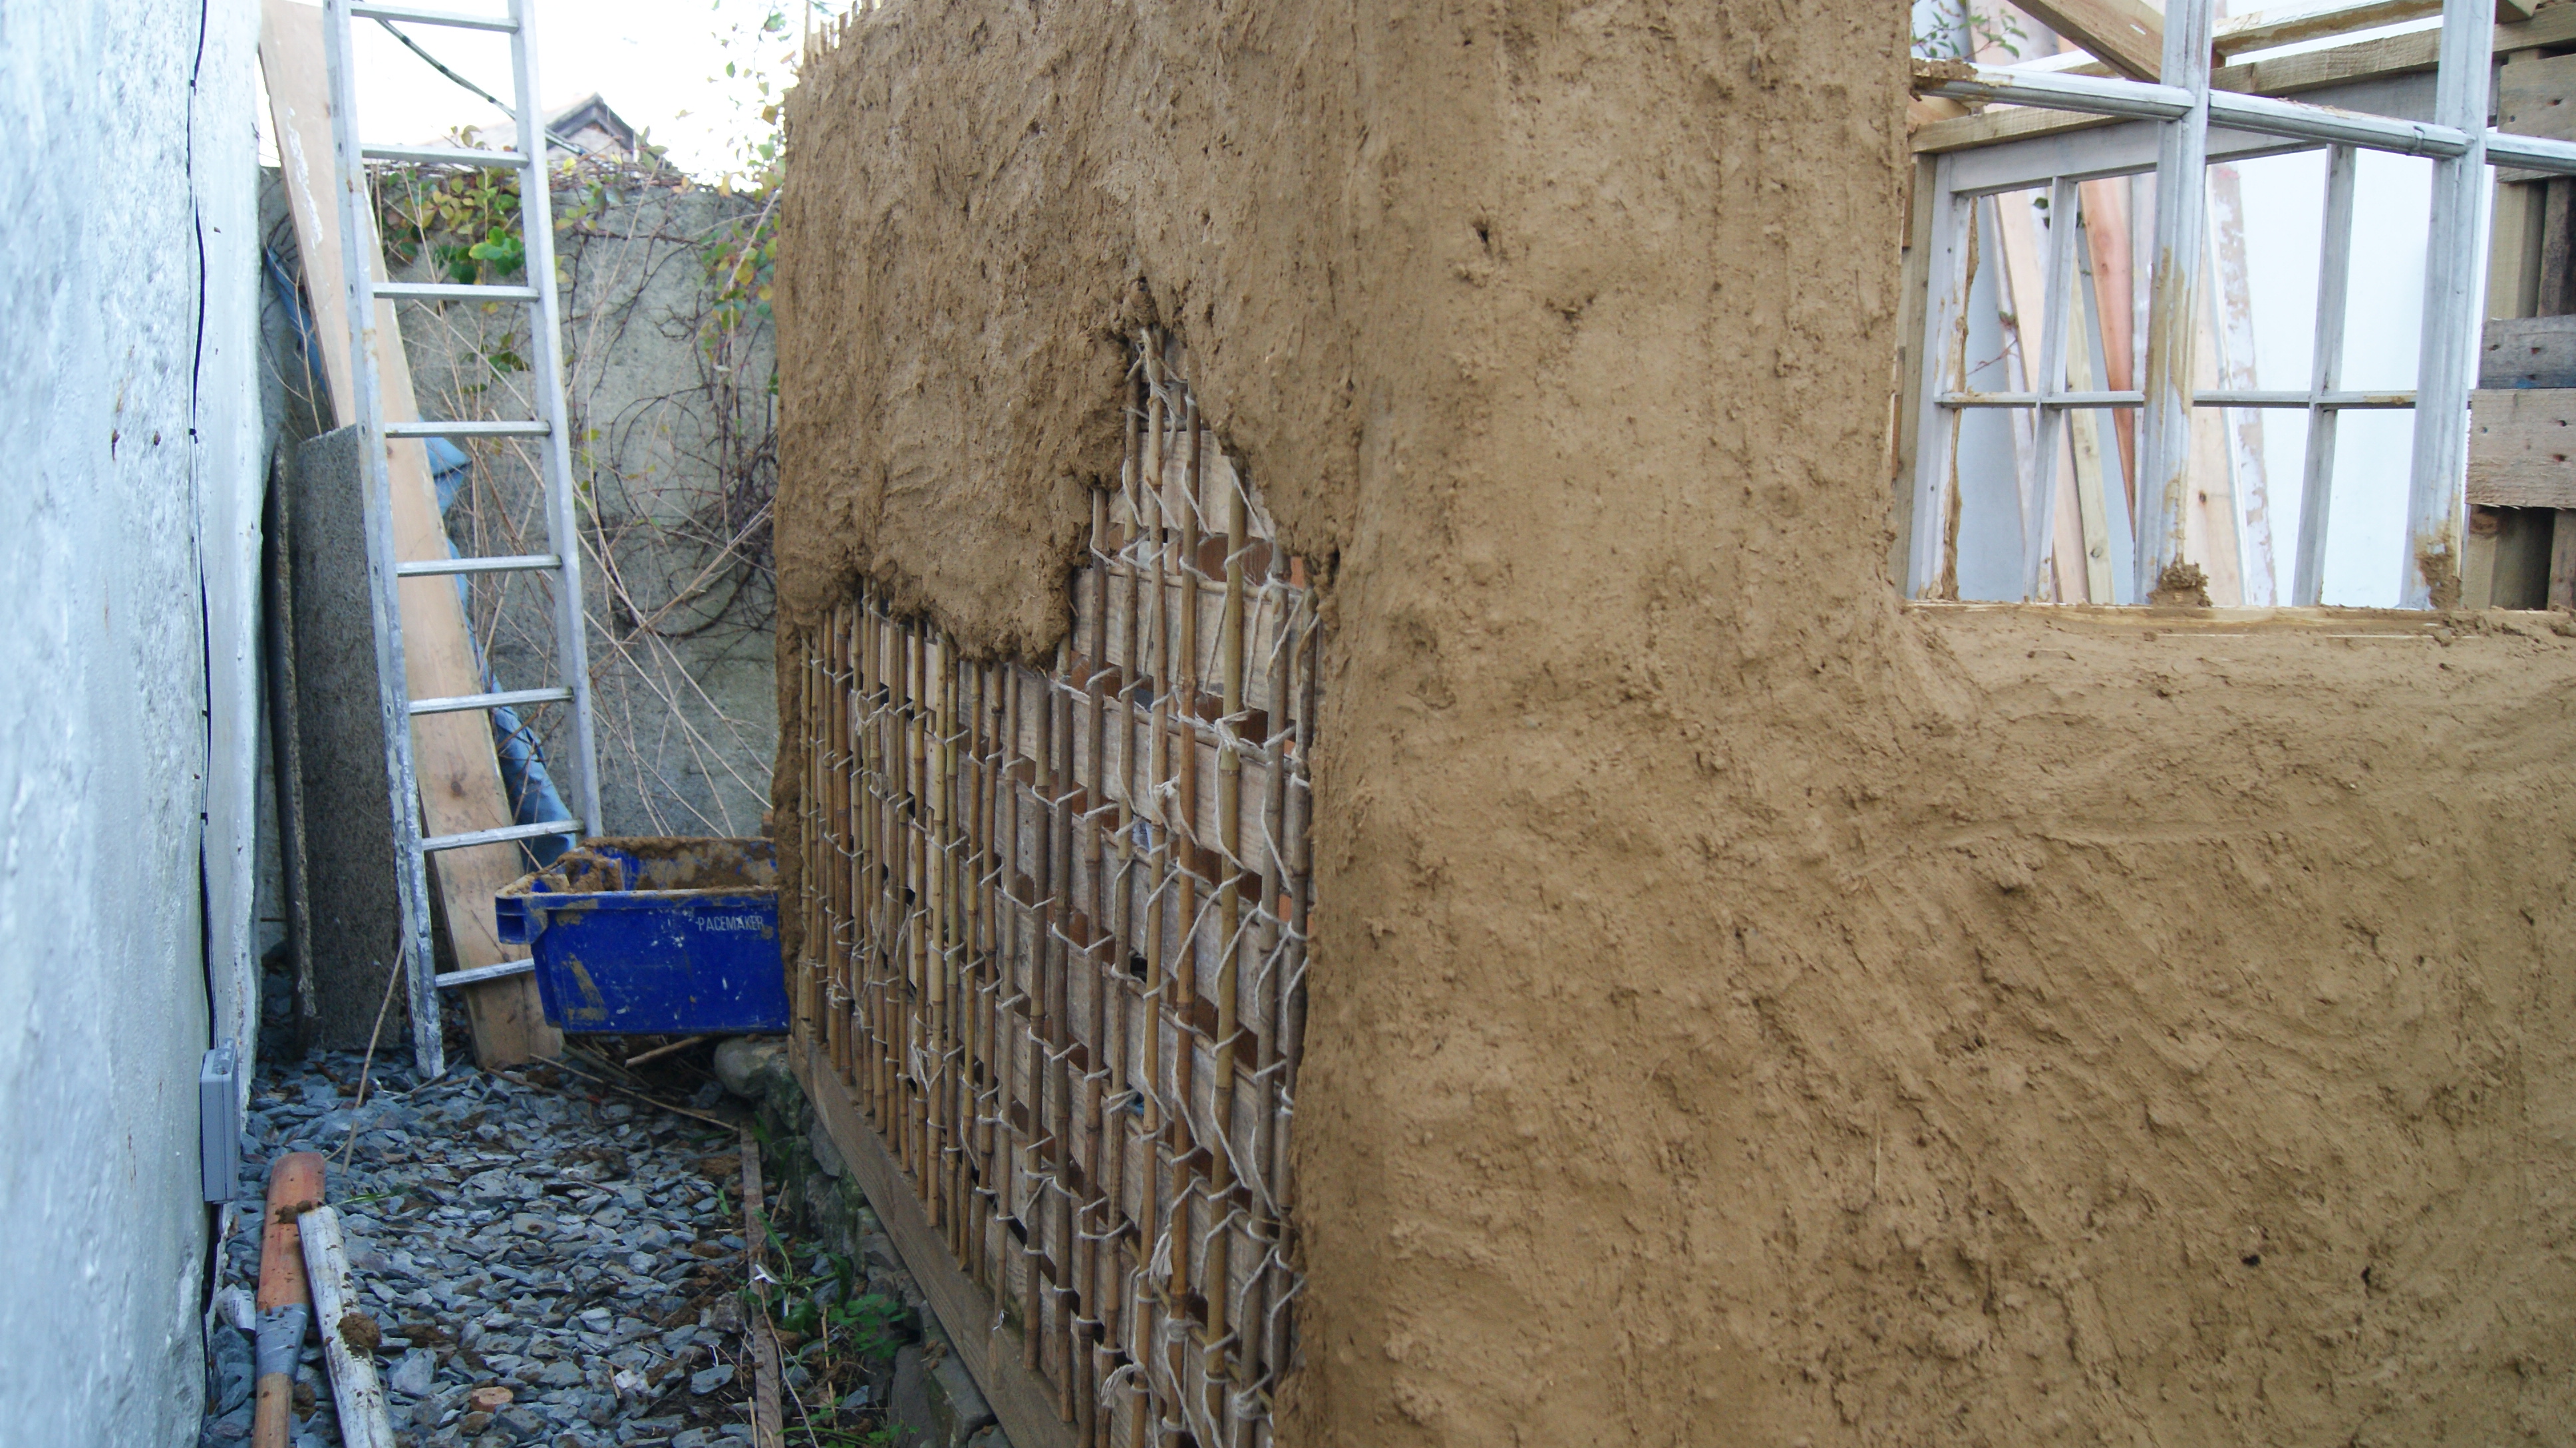
I decided to build a shed from old pallets and I decided to render it with cob – earth, stones and straw – so it would be in keeping with our cottage.
The windows came from an old sash window I was given. The roof will be shingles.
To help fix the cob to the pallets I fixed bamboo canes vertically and rather than nails I tied them on with hemp rope. All very Japanese in influence and all good fun.
Eventually the cob will be covered with lime roughcast and limewashed white to match the cottage.
If the shed had been more planned and less an organic evolving project, there would be no screws or nails in the construction but as it is the pallets are screwed together, it was only after I had done that that I had the idea to tie the canes on, the original idea was to nail on laths but as I had a lot of canes in stock I went with them.
Of course, the rendering is easy – just wack on cob pancakes and press in. It is far too heavy for trowels. It makes my arms ache but it is a joy to work with.
Cob from Heritage Cob & Lime, Bideford. ( as were the pallets )
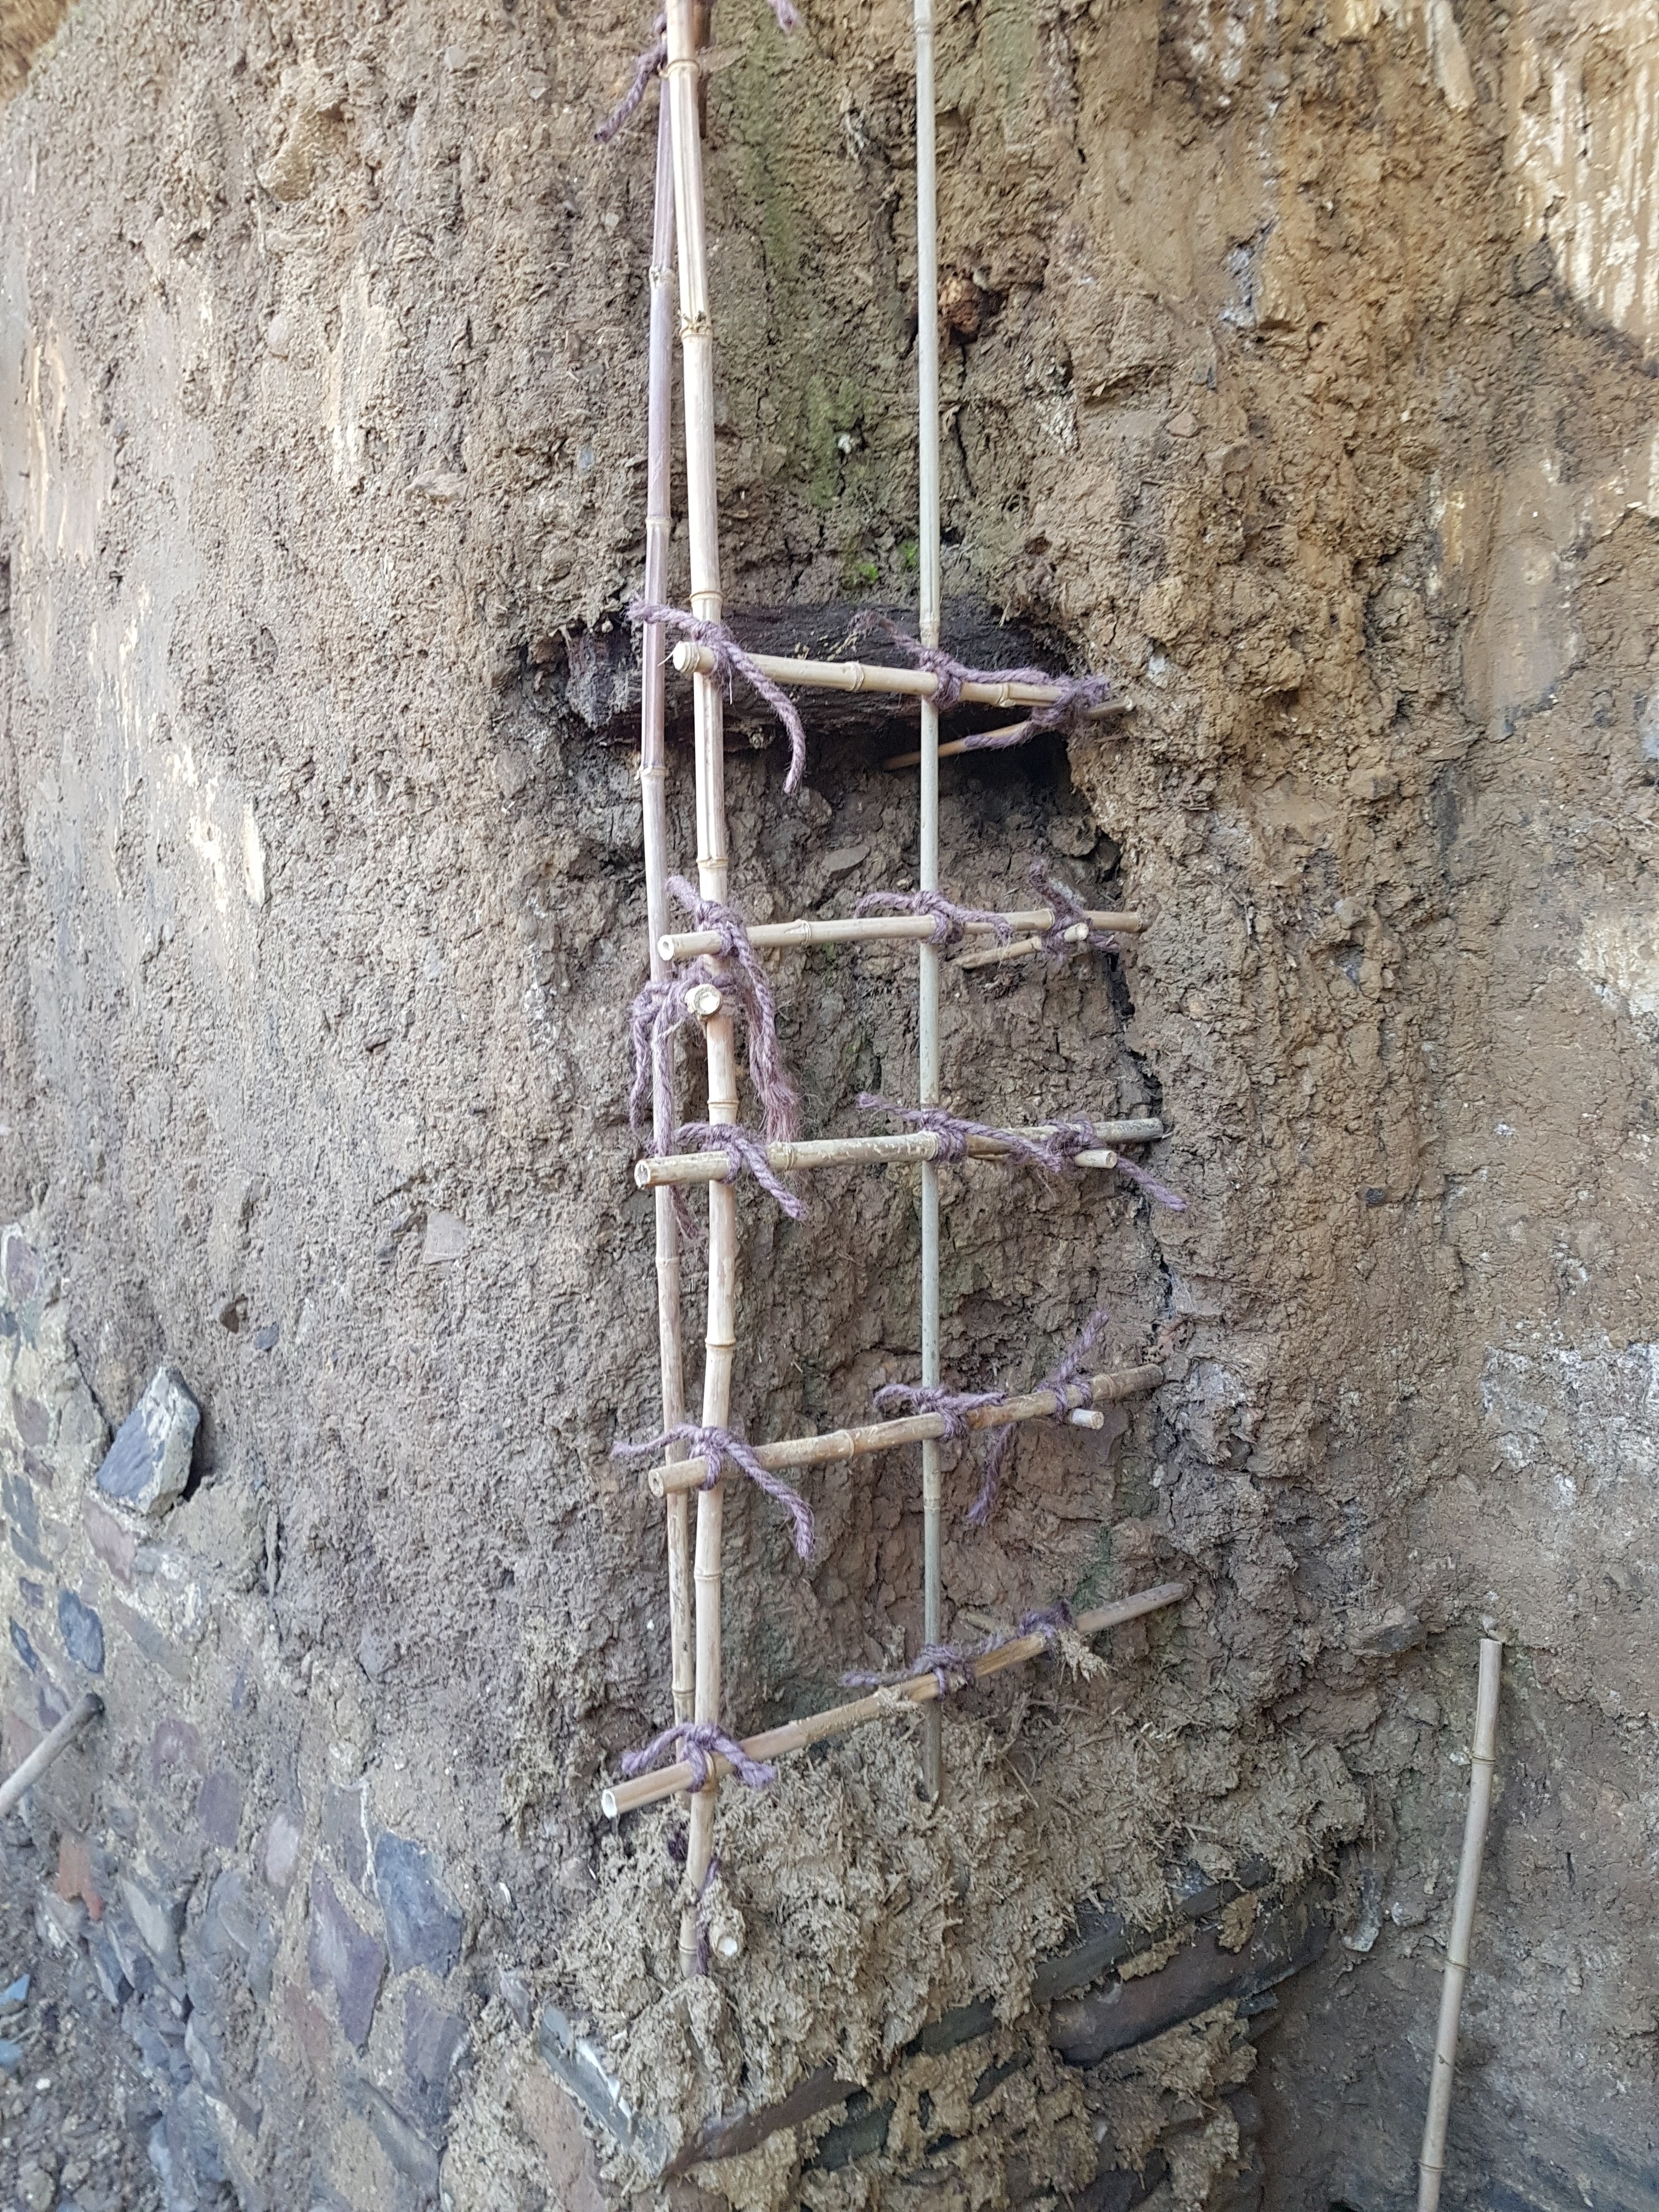
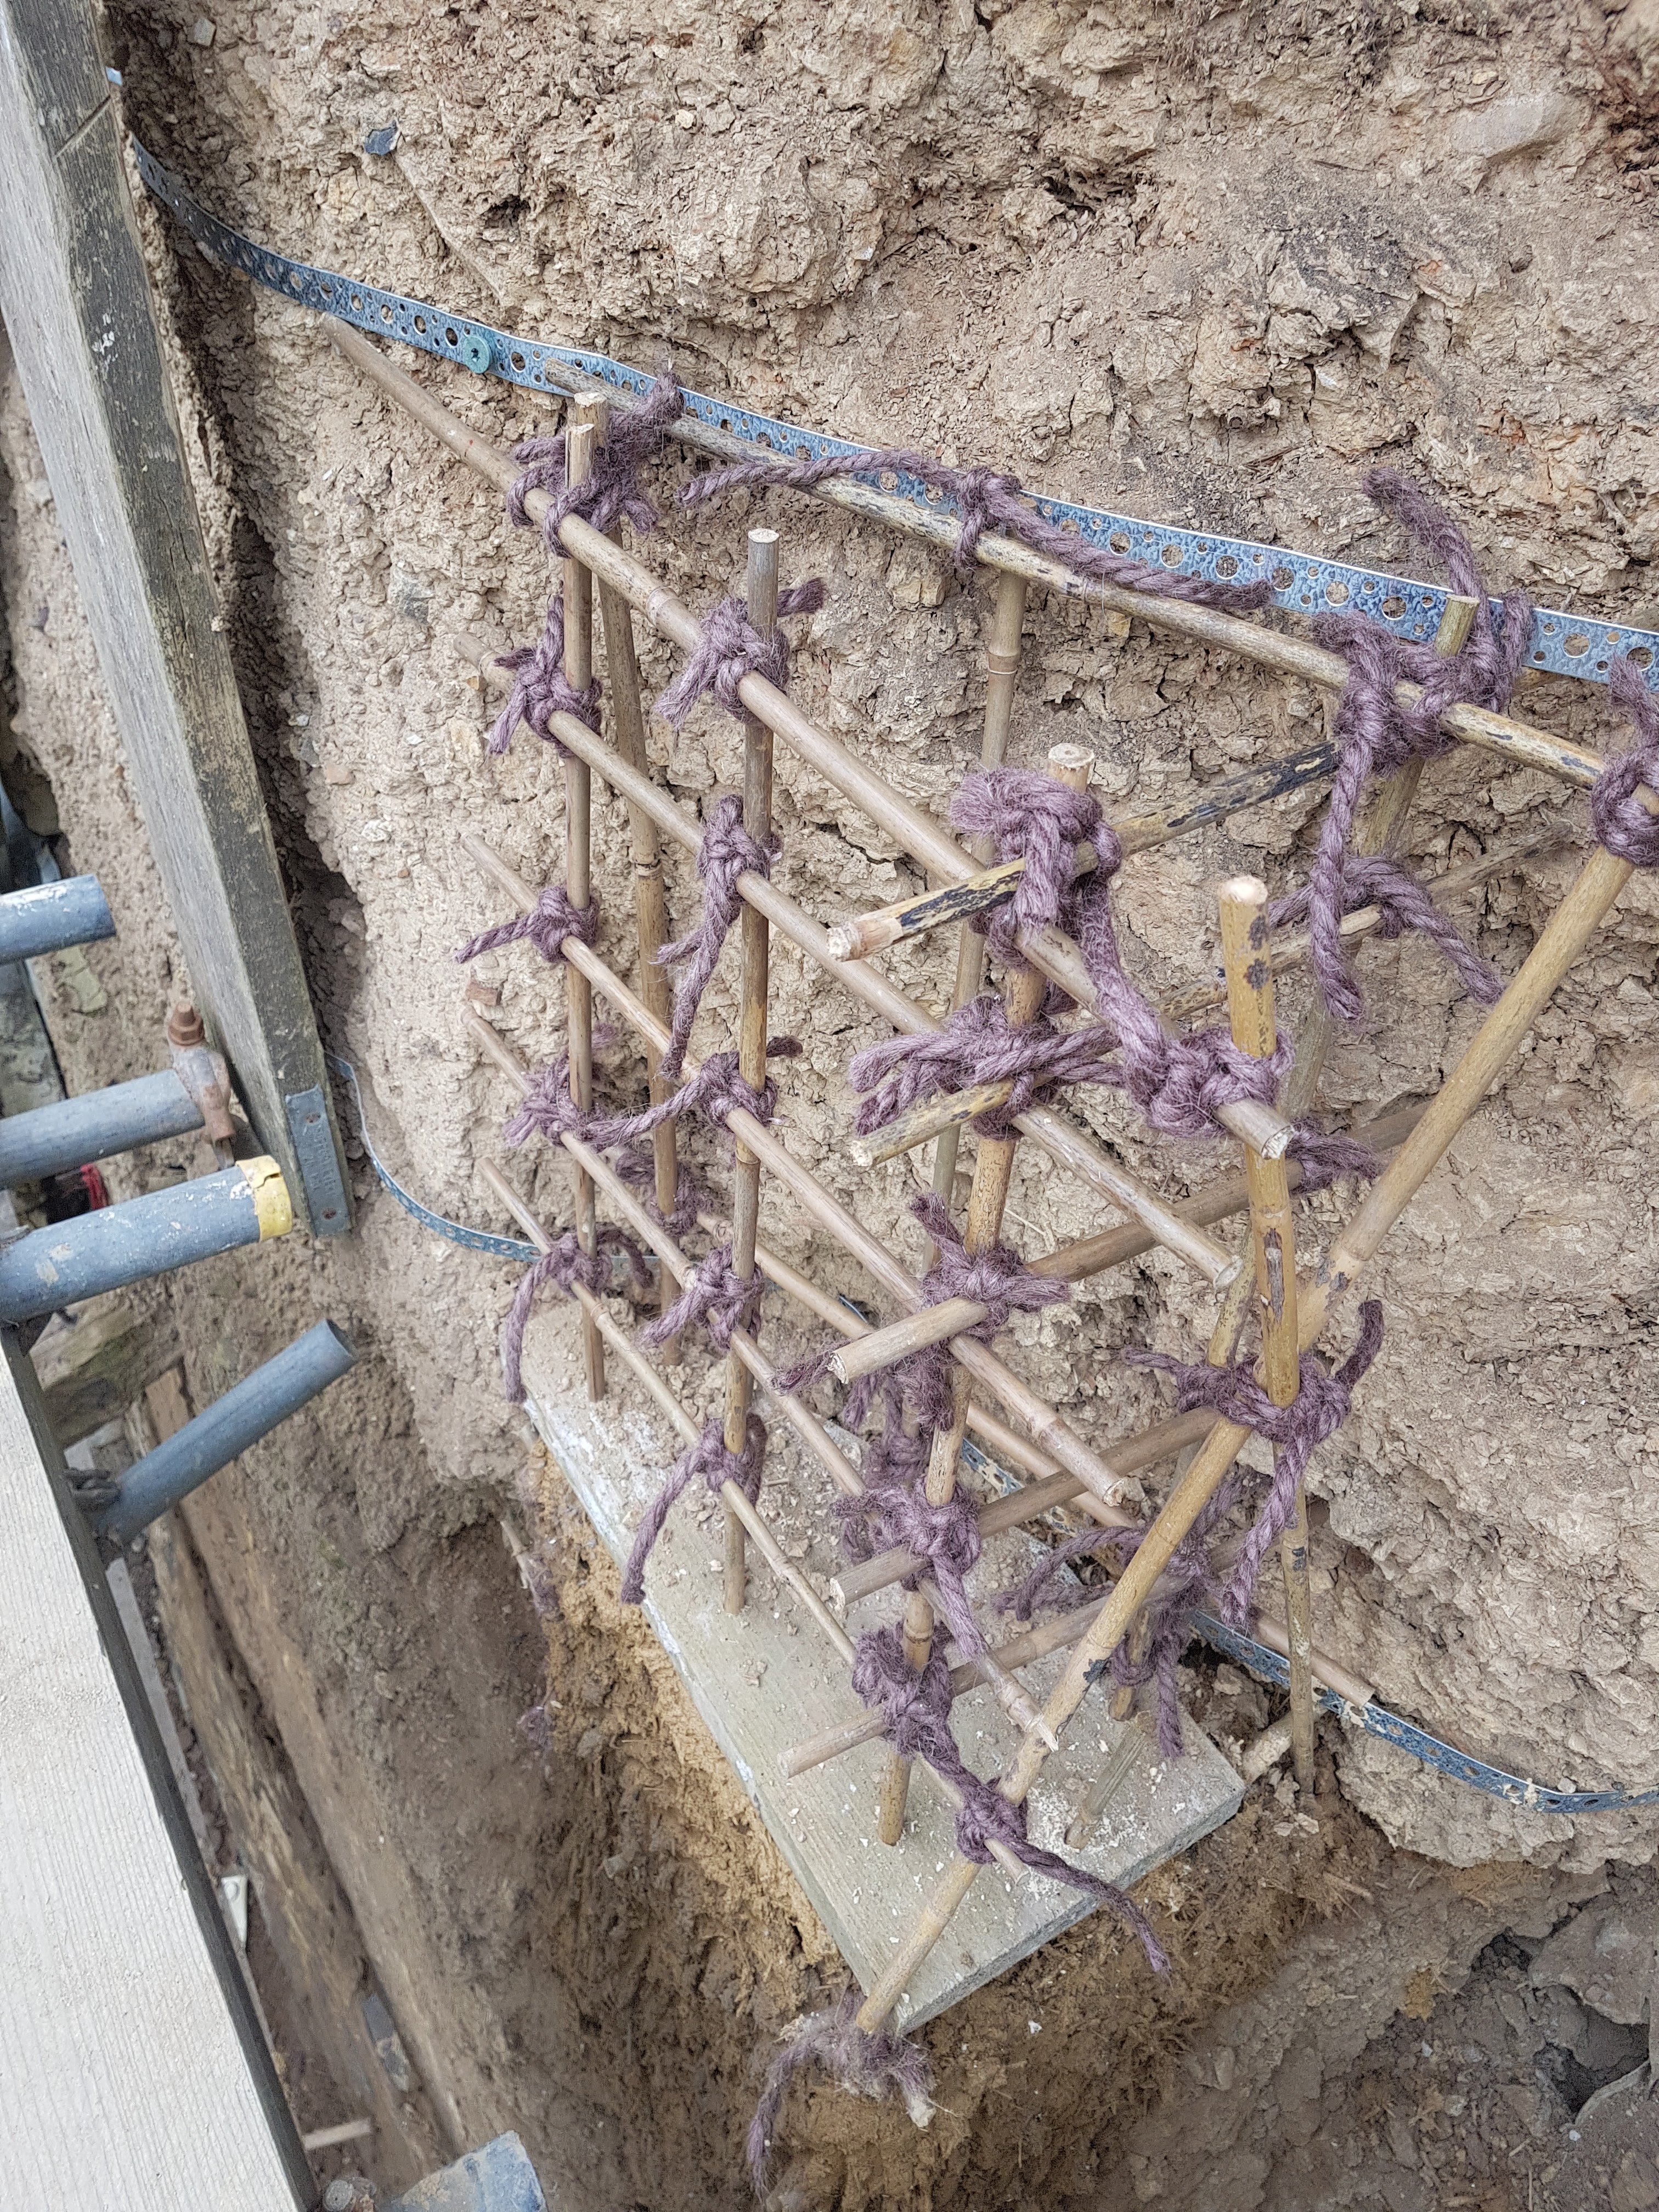
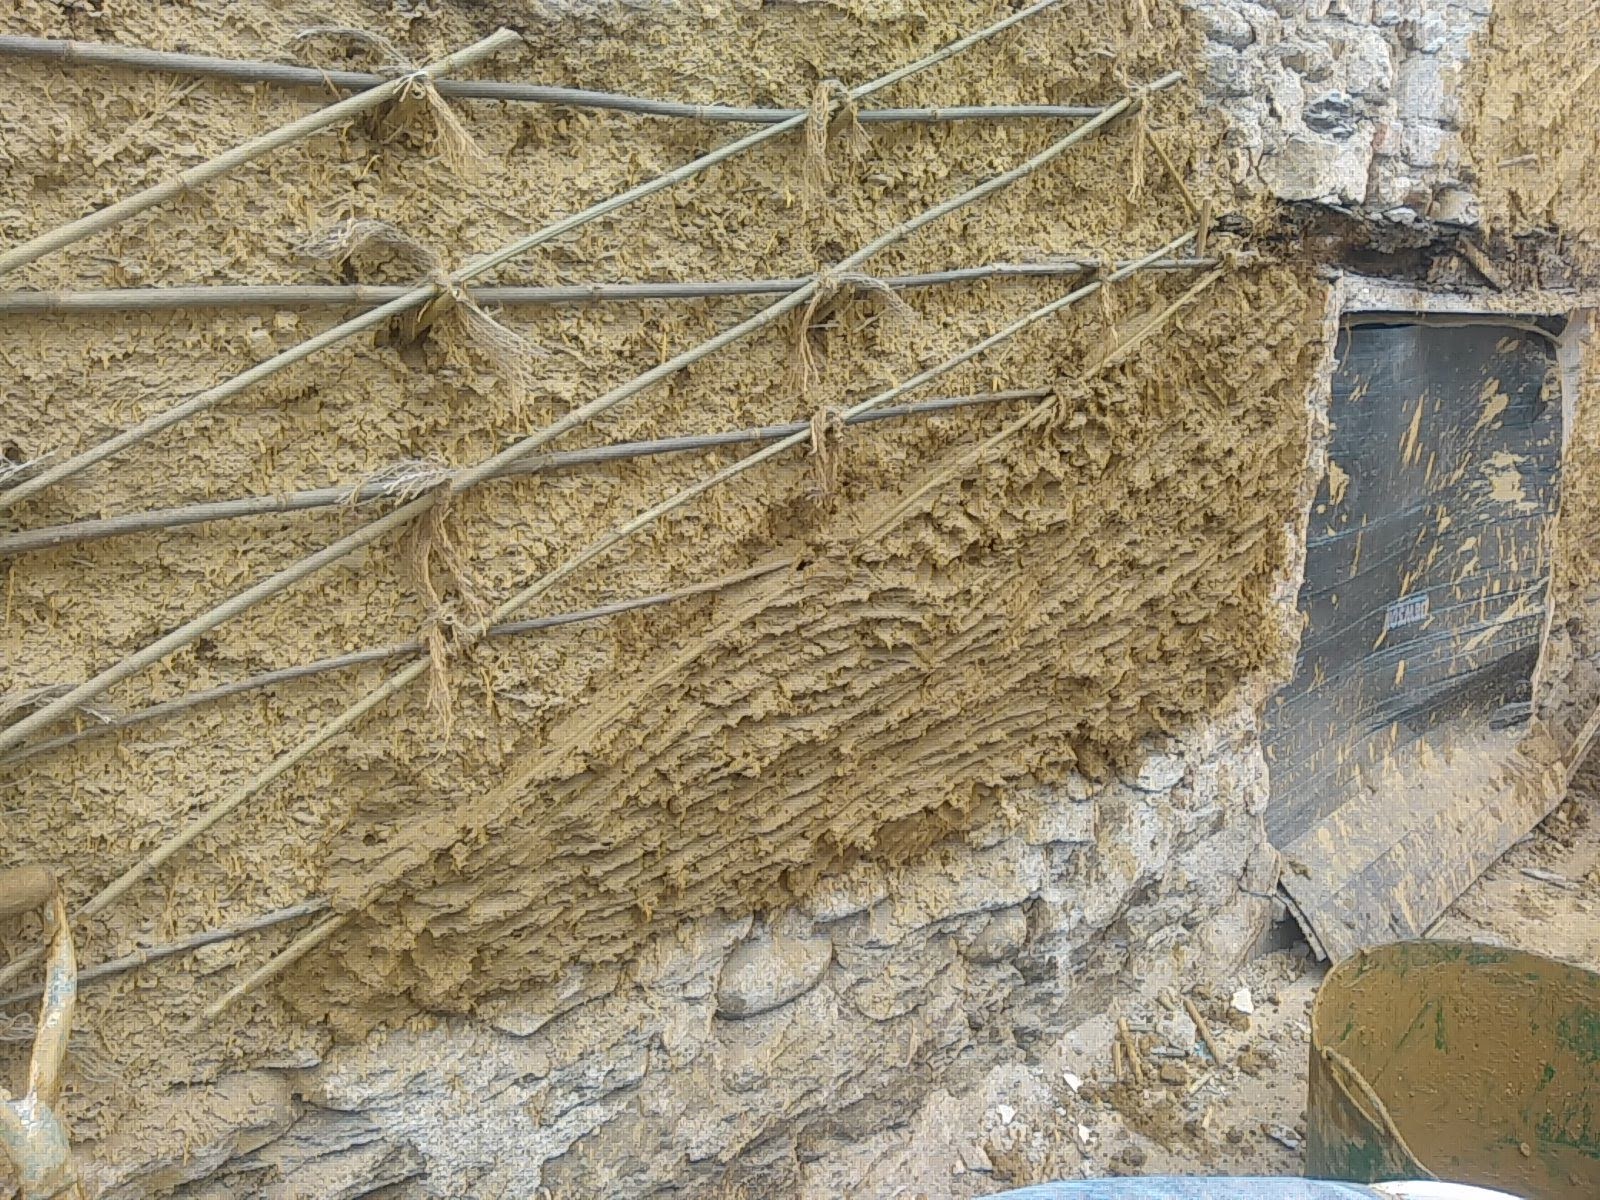
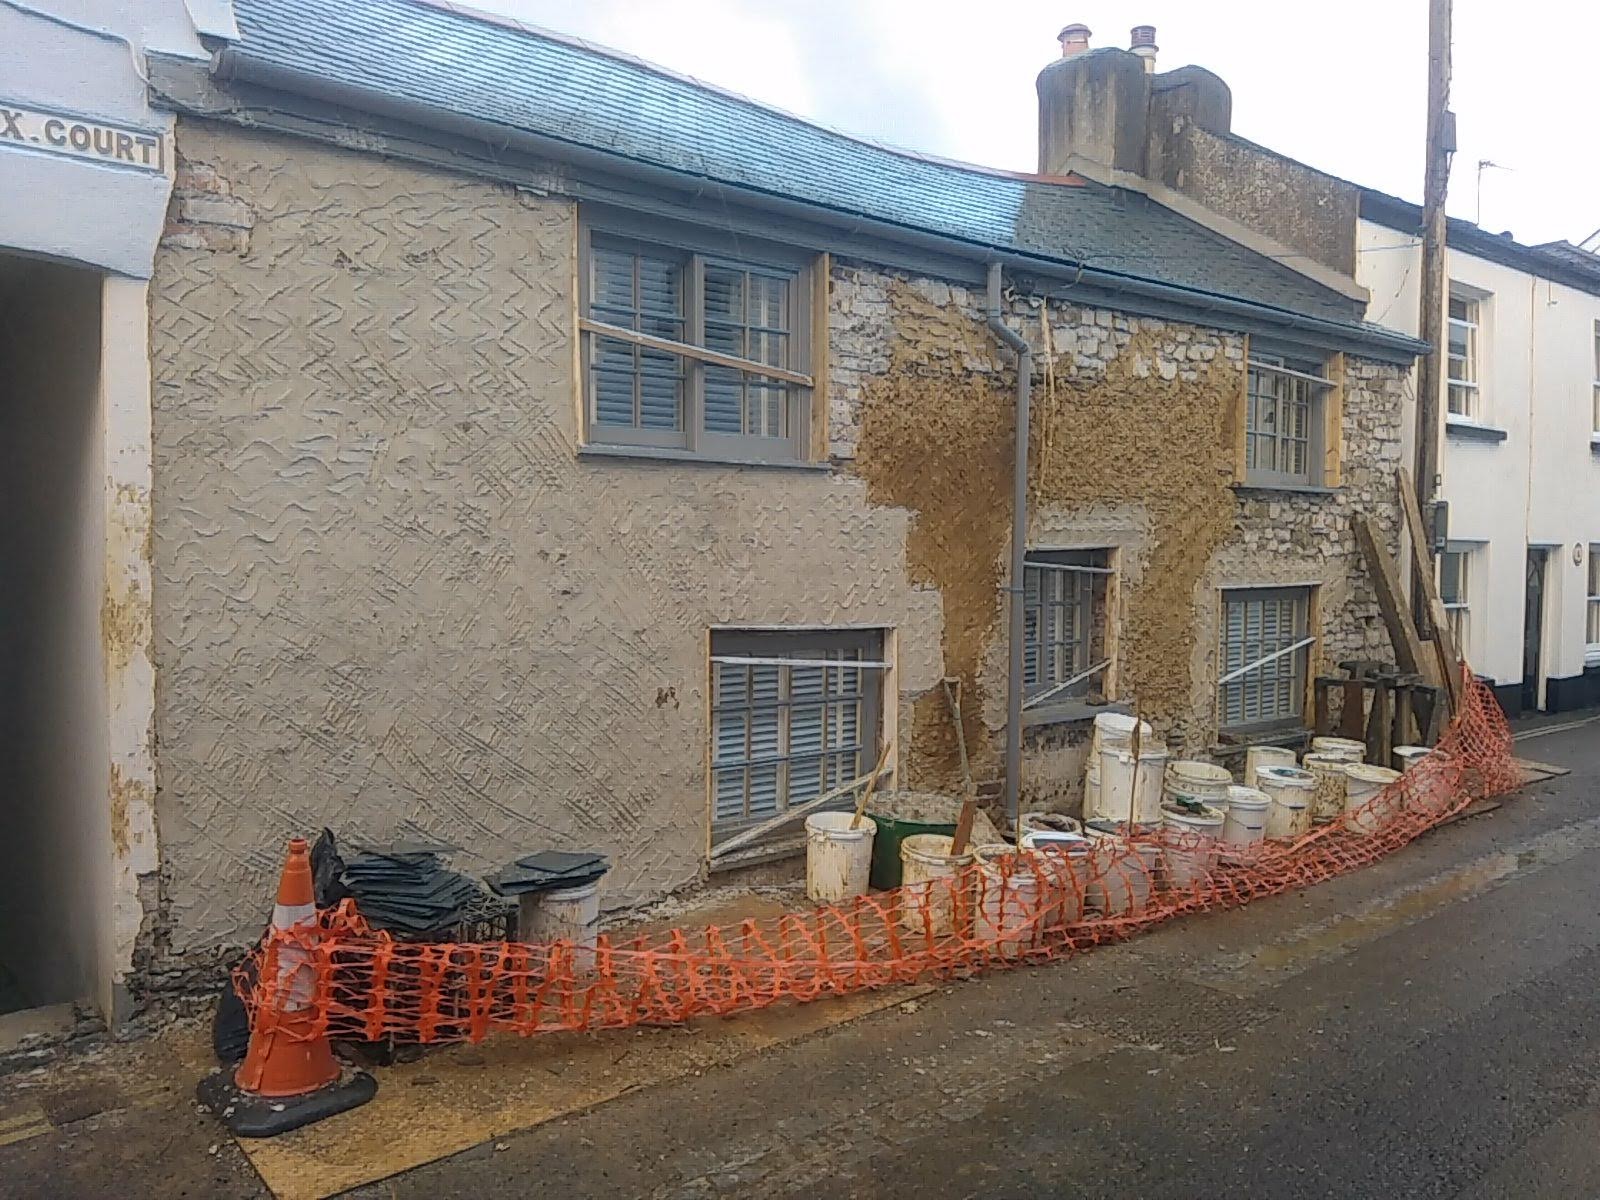
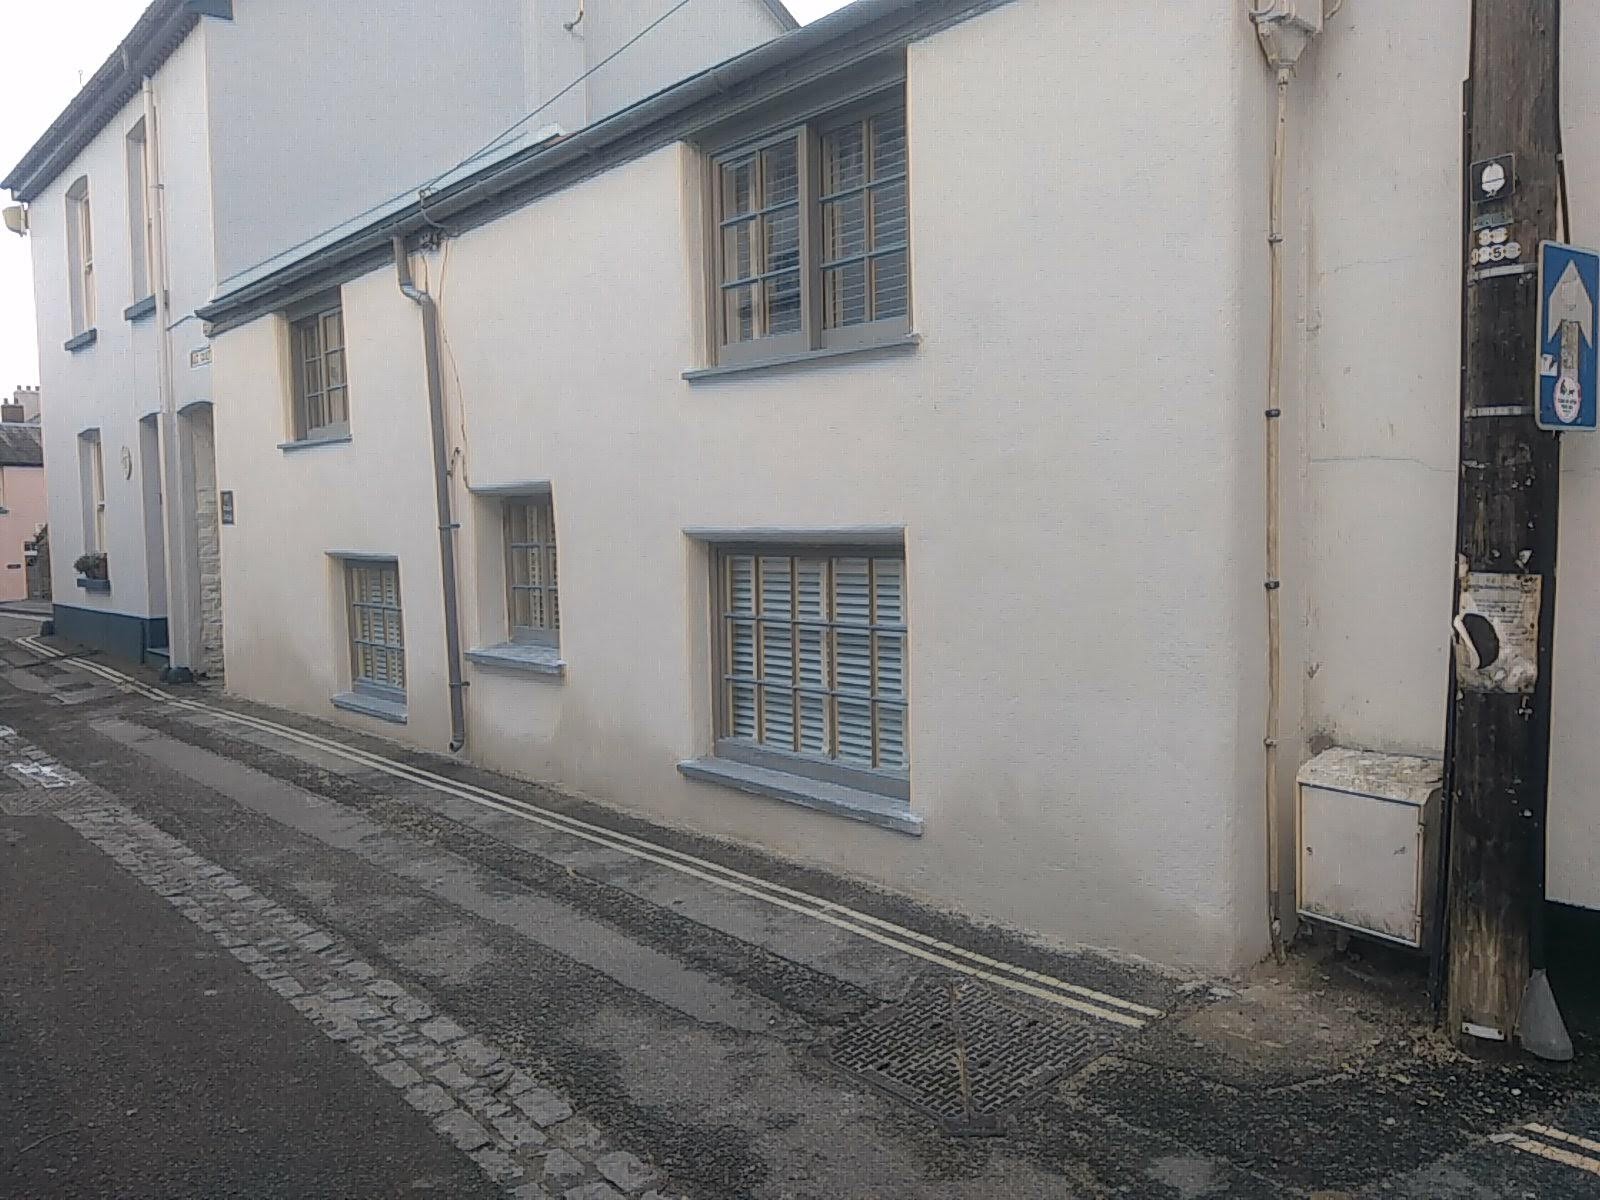
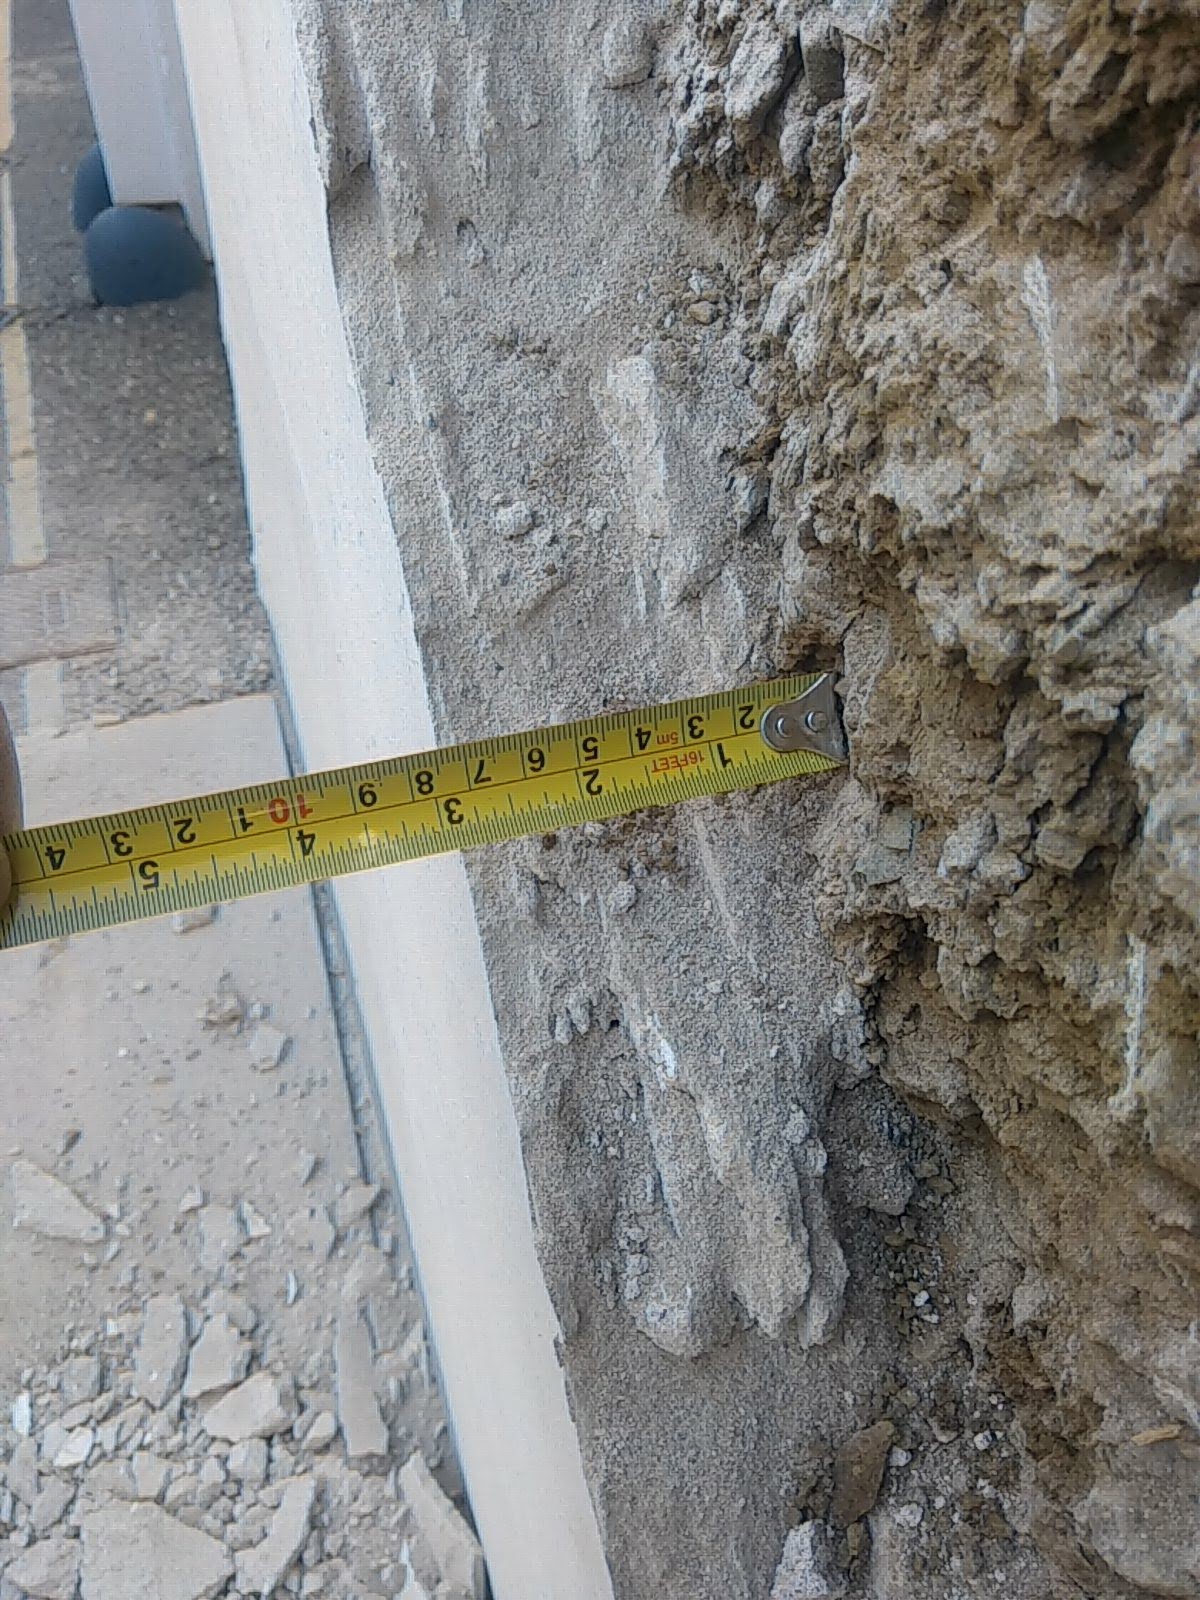
This cottage had a cement render which was cracking. It turned out that it had been applied over thick to the cob without any attempt to anchor it to the dusty surface of the cob so that it was just peeling off.
I rebuilt the cob surface using a bamboo armature and fresh cob then rendered it weather proof with three coats of lime render and four coats of limewash
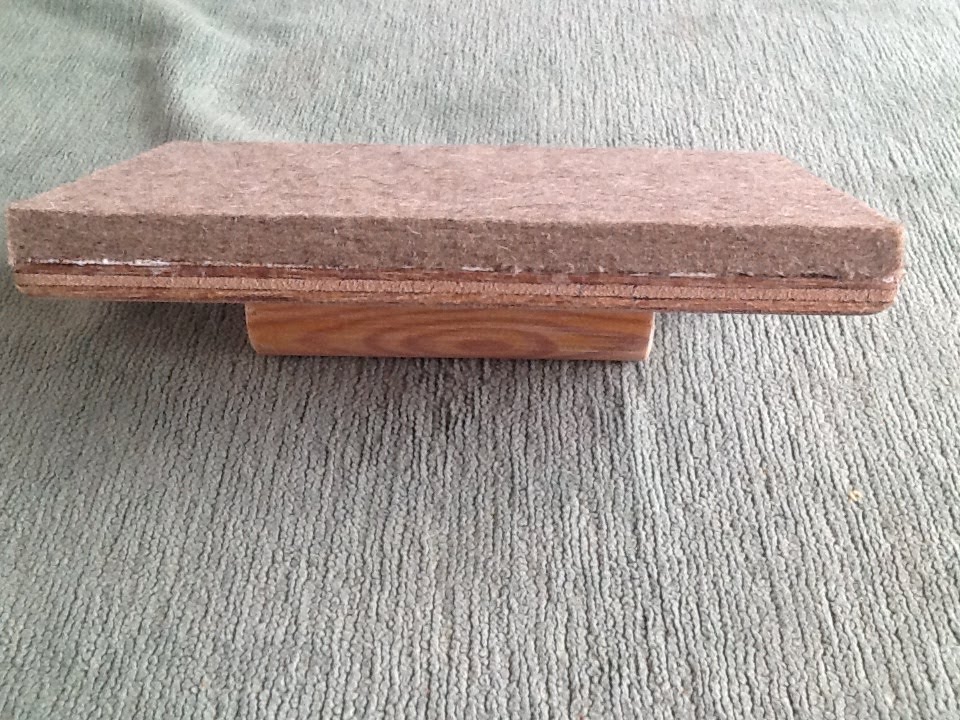
For some reason felt floats are not widely used. They are difficult to find so I thought I would make my own.
I find it really useful for smoothing mortars with a high lime content. Being felt it grips the lime better than wood or foam floats which often slip over the surface more.